https://www.youtube.com/watch?v=xKs2IZZya7c

npm install --global yarn요즘은 yarn 이 대세란다 아무래도 개발자들이 더 많이 쓰고 패키지 업데이트도 자주되고 그래서 좋을거다?
yarn create react-app my-appyarn remove v1.22.19
[1/2] Removing module cra-template...
[2/2] Regenerating lockfile and installing missing dependencies...
warning " > @testing-library/user-event@13.5.0" has unmet peer dependency "@testing-library/dom@>=7.21.4".
warning "react-scripts > eslint-config-react-app > eslint-plugin-flowtype@8.0.3" has unmet peer dependency "@babel/plugin-syntax-flow@^7.14.5".
warning "react-scripts > eslint-config-react-app > eslint-plugin-flowtype@8.0.3" has unmet peer dependency "@babel/plugin-transform-react-jsx@^7.14.9".
warning "react-scripts > react-dev-utils > fork-ts-checker-webpack-plugin@6.5.3" has unmet peer dependency "typescript@>= 2.7".
warning "react-scripts > eslint-config-react-app > @typescript-eslint/eslint-plugin > tsutils@3.21.0" has unmet peer dependency "typescript@>=2.8.0 || >= 3.2.0-dev || >= 3.3.0-dev || >= 3.4.0-dev || >= 3.5.0-dev || >= 3.6.0-dev || >= 3.6.0-beta || >= 3.7.0-dev || >= 3.7.0-beta".
success Uninstalled packages.
Done in 15.24s.
Created git commit.
Success! Created my-app at C:\Users\leejoonho\Desktop\my_portfolio_blog\client\my-app
Inside that directory, you can run several commands:
yarn start
Starts the development server.
yarn build
Bundles the app into static files for production.
yarn test
Starts the test runner.
yarn eject
Removes this tool and copies build dependencies, configuration files
and scripts into the app directory. If you do this, you can’t go back!
We suggest that you begin by typing:
cd my-app
yarn start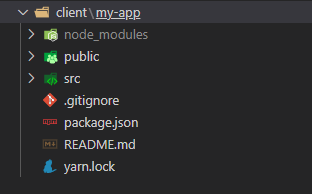
yarn start

import "./App.css";

function App() {
  return (
    <main>
      <header>
        <a href="" className="logo">
          MyBlog
        </a>
        <nav>
          <a href="">Login</a>
          <a href="">Register</a>

        </nav>
      </header>
      <div className="post">

        <div className="image">
          <img src="https://techcrunch.com/wp-content/uploads/2023/03/chatgpt-getty.jpg?w=1390&crop=1" alt="" />
        </div>

        <div className="texts">
          <h2>OpenAI previews business plan for ChatGPT, launches new privacy controls</h2>
          <p className="info">
            <a className="author">Lee</a>
            <time>2023-04-26 16:45</time>
          </p>
          <p className="summary">OpenAI says that it plans to introduce a new subscription tier for ChatGPT, its viral AI-powered chatbot, tailored to the needs of enterprise customers.

            Called ChatGPT Business, OpenAI describes the forthcoming offering as “for professionals who need more control over their data as well as enterprises seeking to manage their end users.”

            “ChatGPT Business will follow our API’s data usage policies, which means that end users’ data won’t be used to train our models by default,” OpenAI wrote in a blog post published today. “We plan to make ChatGPT Business available in the coming months.”</p>
        </div>

      </div>

    </main>
  );
}

export default App;
body {
color: #222;
}
img {
max-width: 100%;
}
main {
padding: 10px;
max-width: 500px;
margin: 0 auto;
}
header {
display: flex;
justify-content: space-between;
margin-top: 20px;
margin-bottom: 50px;
align-items: center;
}
header a {
text-decoration: none;
color: inherit;
}
header a.logo {
font-weight: bold;
font-size: 1.5rem;
}
header nav {
display: flex;
gap: 15px;
}
div.post {
display: grid;
grid-template-columns: 0.9fr, 1.1fr;
gap: 20px;
margin-bottom: 30px;
}
div.post div.texts h2 {
margin: 0;
font-size: 1.8rem;
}
div.post p.info {
margin: 6px 0;
color: #888;
font-size: 0.7rem;
font-weight: bold;
display: flex;
gap: 10px;
}
div.post p.info a.author {
color: #333;
}
div.post p.summary {
margin: 10px 0;
line-height: 1.4rem;
}https://yarnpkg.com/package/react-router-dom
https://yarnpkg.com/package/react-router-dom
Fast, reliable, and secure dependency management.
yarnpkg.com
yarn add react-router-domapp.js
import { Routes, Route } from "react-router-dom";import { Routes, Route } from "react-router-dom";
import "./App.css";
import Header from "./header";
import Post from "./post";
function App() {
return (
<Routes>
<Route index element={
<main>
<Header />
<Post />
<Post />
</main>
} />
</Routes>
);
}
export default App;index.js
import { BrowserRouter } from 'react-router-dom';<BrowserRouter>
<App />
</BrowserRouter>
import React from 'react';
import ReactDOM from 'react-dom/client';
import './index.css';
import App from './App';
import reportWebVitals from './reportWebVitals';
import { BrowserRouter } from 'react-router-dom';
const root = ReactDOM.createRoot(document.getElementById('root'));
root.render(
<React.StrictMode>
<BrowserRouter>
<App />
</BrowserRouter>
</React.StrictMode>
);
// If you want to start measuring performance in your app, pass a function
// to log results (for example: reportWebVitals(console.log))
// or send to an analytics endpoint. Learn more: https://bit.ly/CRA-vitals
reportWebVitals();loginpage
<Route path={'/login'} element={
<main>
<Header />
<div>login page</div>
</main>
} />
</Routes>layout.js
import { Outlet } from "react-router-dom"import { Outlet } from "react-router-dom"
import Header from "./header"
export default function Layout() {
return (
<main>
<Header />
<Outlet />
</main>
)
}https://velog.io/@aejin24/React-Outlet-react-router-dom-v6
[React] Outlet (react-router-dom v6)
실무하면서 왼쪽 하단에 네비게이션을 달다가 일부 페이지에서는 네비게이션이 없어야하는 상황이 생겼다처음에는 훅스를 이용해서 처리할까 하다가 react-router-dom에 Outlet이라는 속성을 처음봤
velog.io
Outlet -> 쉽게 Layout을 바꿔준다
import { Routes, Route } from "react-router-dom";
import "./App.css";
import Header from "./header";
import Post from "./post";
import Layout from "./layout";
function App() {
return (
<Routes>
<Route path='/' element={<Layout />}>
<Route index element={<Post />} />
<Route path={'/login'} element={<div>Login Page</div>} />
</Route>
</Routes>
);
}
export default App;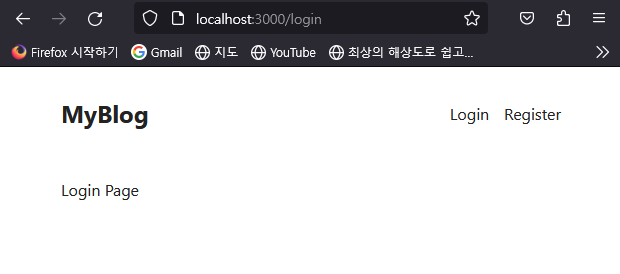
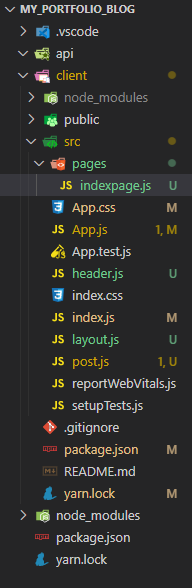
라우팅용 페이지를 하나 더 만드네
indexpage.js
import Post from "../post";
export default function IndexPage() {
return (
<div>
<Post />
<Post />
<Post />
</div>);
}라우팅 해줄 LoginPage , RegisterPage를 만들어준다,
export default function LoginPage() {
return (
<form className="login" action="">
<h1>Login</h1>
<input type="text" placeholder="username" />
<input type="password" placeholder="password" />
<button>Login</button>
</form>
);
}export default function RegisterPage() {
return (
<form class="register" action="">
<h1>Register</h1>
<input type="text" placeholder="username" />
<input type="password" placeholder="password" />
<button>Register</button>
</form>
);
}import { Routes, Route } from "react-router-dom";
import "./App.css";
import Layout from "./layout";
import IndexPage from "./pages/indexpage";
import LoginPage from "./pages/loginpage";
import RegisterPage from "./pages/registerpage";
function App() {
return (
<Routes>
<Route path='/' element={<Layout />}>
<Route index element={<IndexPage />} />
<Route path={'/login'} element={<LoginPage />} />
<Route path={'/register'} element={<RegisterPage />} />
</Route>
</Routes>
);
}
export default App;여기 까지의 css
* {
box-sizing: border-box;
}
body {
  color: #222;
}
img {
  max-width: 100%;
}

main {
  padding: 10px;
  max-width: 500px;
  margin: 0 auto;
}

header {
  display: flex;
  justify-content: space-between;
  margin-top: 20px;
  margin-bottom: 50px;
  align-items: center;
}

header a {
  text-decoration: none;
  color: inherit;
}

header a.logo {
  font-weight: bold;
  font-size: 1.5rem;
}
header nav {
  display: flex;
  gap: 15px;
}
div.post {
  display: grid;
  grid-template-columns: 0.9fr, 1.1fr;
  gap: 20px;

  margin-bottom: 30px;
}

div.post div.texts h2 {
  margin: 0;
  font-size: 1.8rem;
}
div.post p.info {
  margin: 6px 0;
  color: #888;
  font-size: 0.7rem;
  font-weight: bold;
  display: flex;
  gap: 10px;
}
div.post p.info a.author {
  color: #333;
}
div.post p.summary {
  margin: 10px 0;
  line-height: 1.4rem;
}
form.login form.register {
max-width: 400px;
margin: 0 auto;
}
input {
display: block;
margin-bottom: 5px;
width: 100%;
padding: 5px 7px;
border: 2px solid #ddd;
border-radius: 5px;
background-color: #fff;
border-bottom: 1px solid #ccc;
}
button {
width: 100%;
display: block;
background-color: #555;
border: 0;
color: #fff;
border-radius: 5px;
padding: 7px 0;
}
form h1 {
text-align: center;
}
해당 경로에 express 설치 !
yarn add express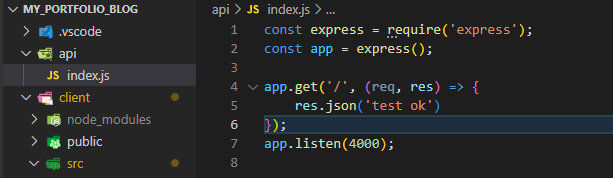
const express = require('express');
const app = express();

app.get('/', (req, res) => {
    res.json('test ok')
});
app.listen(4000);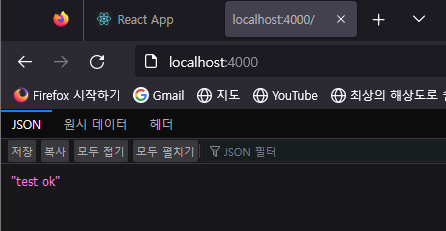
yarn add global nodemonregisterpage.js
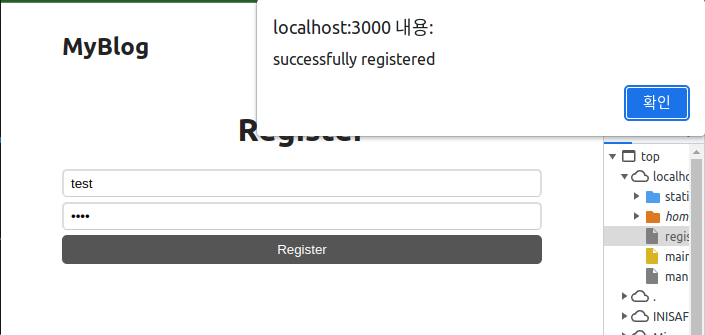
import { useState } from "react";

export default function RegisterPage() {

    const [username, setUsername] = useState('')
    const [password, setPassword] = useState('')

    async function register(ev) {
        ev.preventDefault();
        await fetch('http://localhost:4000', {
            method: 'POST',
            body: JSON.stringify({ username, password }),
            headers: { 'Content-Type': 'application/json' },
        })
    }

    return (

        <form className="register" onSubmit={register} >
            <h1>Register</h1>
            <input
                type="text"
                placeholder="username"
                value={username}
                onChange={ev => setUsername(ev.target.value)}
            />
            <input
                type="password"
                placeholder="password"
                value={password}
                onChange={ev => setPassword(ev.target.value)} />
            <button>Register</button>
        </form>
    );
}
하지만 버튼을 클릭하면 ?
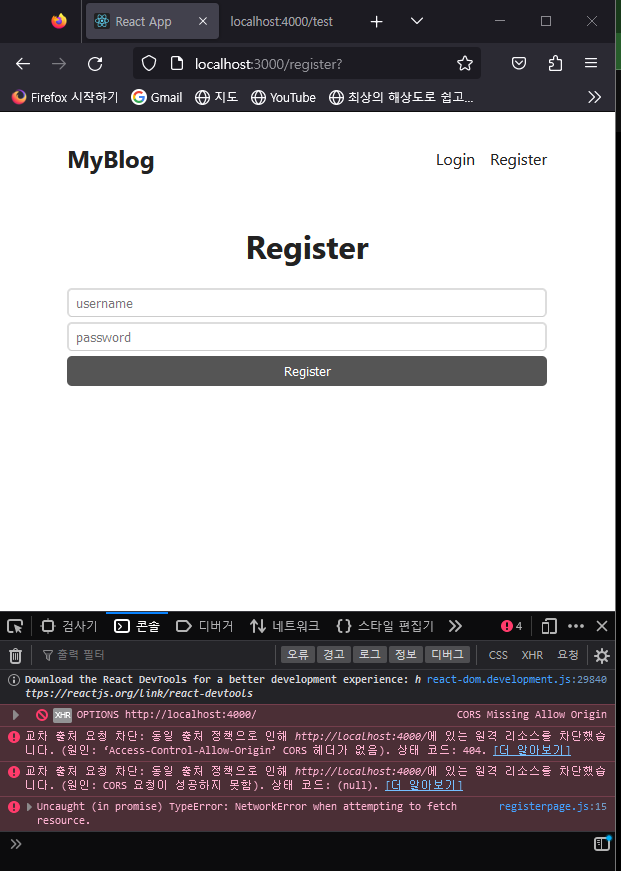
이런 에러가 발생하죠 ?
CORS란? CORS를 해결해보자
20200522프로젝트를 하면서 프론트에서 서버에서 제공한 API로 요청하자, CORS 에러가 발생했다. 지금까지 CORS에러를 해결하기만 하고 정확히 CORS가 무엇이고 어떻게 동작하는지 알지 못했다.
이번에 CORS가 어떻게 동작하고 CORS 에러를 해결하는 방법을 공부하였고 공부하면서 알게된 내용을 정래해보았다.
CORS?
Cross Origin Resource Sharing
CORS는 한 도메인 또는 Origin의 웹 페이지가 다른 도메인 (도메인 간 요청)을 가진 리소스에 액세스 할 수 있게하는 보안 메커니즘이다.
CORS는 서버와 클라이언트가 정해진 헤더를 통해 서로 요청이나 응답에 반응할지 결정하는 방식으로 CORS라는 이름으로 표준화 되었다. CORS는 최신 브라우저에서 구현된 동일 출처 정책(same-origin policy) 때문에 등장했다.
동일 출처 정책?
동일 출처 정책은 동일한 출처의 리소스에만 접근하도록 제한하는 것이다. 여기서 출처는 프로토콜, 호스트명, 포트가 같다는 것을 의미한다.
https://naver.com:80을 예시로 들면, https는 프로토콜, naver.com은 호스트명 80은 포트다.
왜 동일한 출처에서만 접근하도록 허용하는 것일까? 모든 출처를 허용하면 어떻게 될까?
https://bank.com 이라는 도메인 사이트가 있다 이 사이트의 api 주소는 https://bank.com/api이다. 사용자가 은행 사이트에서 로그인을 한 후 인증 토큰을 받았다. 그런데 사용자가 로그인한 상태에서 https://evil.com사이트에 접속하게 되면, https://evil.com사이트에서 https://bank.com/api로 ajax 요청을 보낼 때 유저가 획득한 인증 토큰이 자동으로 첨부되어 사용자인척하면서 요청을 보낼 수 있게 된다.
이렇게 자동으로 쿠키가 첨부되기 때문에 보안상의 이유로 브라우저는 HTTP 호출을 동일한 출처로 제한했다.
왜 CORS가 생겼을까?
그럼 왜 CORS가 필요하게 됐을까?
이전에는 동일한 도메인에서 리소스를 받아왔는데, 지금은 클라이언트에서 도메인이 다른 서버에서 제공하는 API를 사용하는 일이 많아졌다.
그래서 이전처럼 동일한 도메인간의 요청만 할 수 없어졌고 CORS가 생겼다.
https://bohyeon-n.github.io/deploy/web/cors.html
CORS란? CORS를 해결해보자 | 구보현 블로그
CORS란? CORS를 해결해보자 20200522 프로젝트를 하면서 프론트에서 서버에서 제공한 API로 요청하자, CORS 에러가 발생했다. 지금까지 CORS에러를 해결하기만 하고 정확히 CORS가 무엇이고 어떻게 동작
bohyeon-n.github.io
yarn add corsapi/index.js
const express = require('express');
const cors = require('cors');
const app = express();

app.use(cors())
app.use(express.json());

app.post('/register', (req, res) => {
    const { username, password } = req.body;
    console.log(username, password);

    res.json({ requestData: { username, password } });
});

app.listen(4000);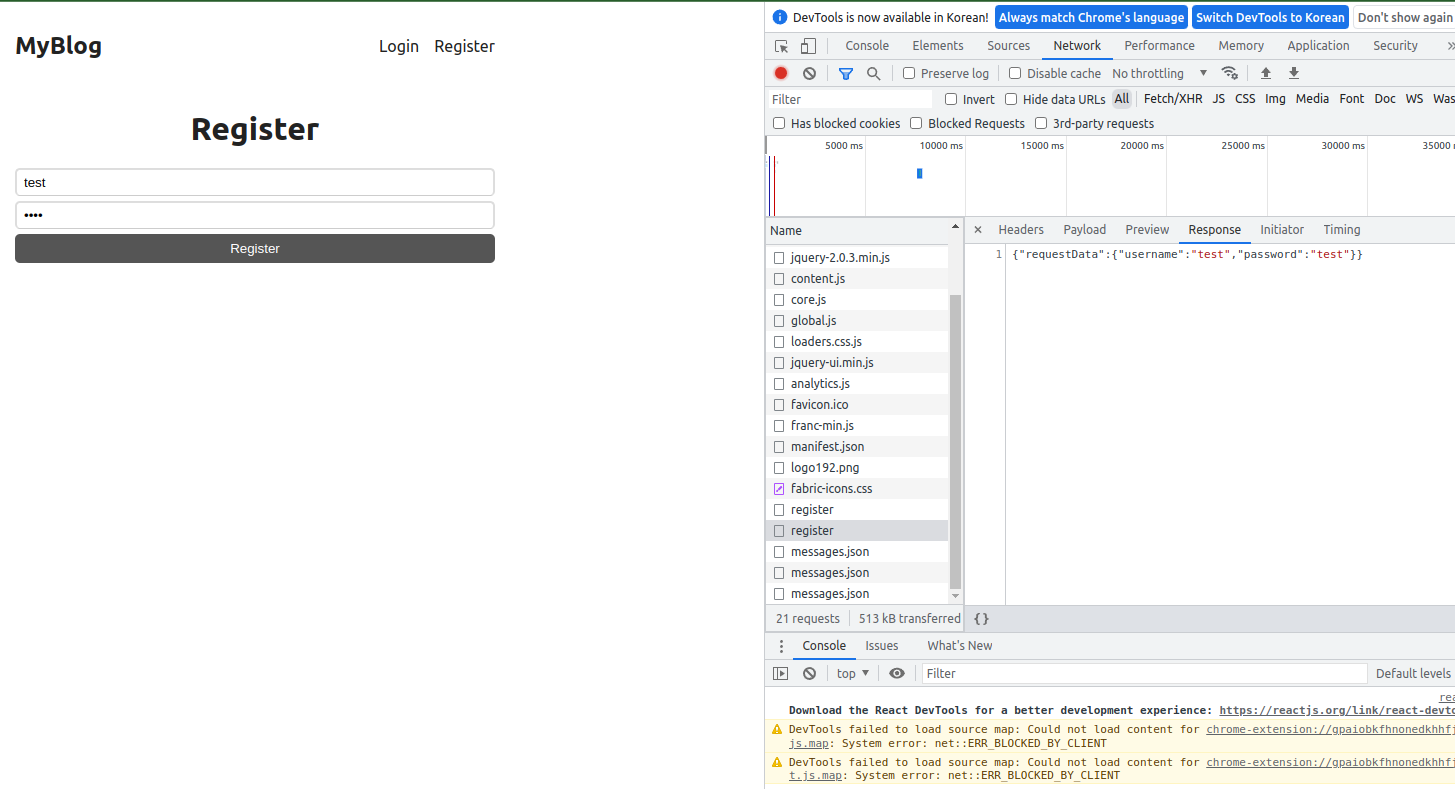
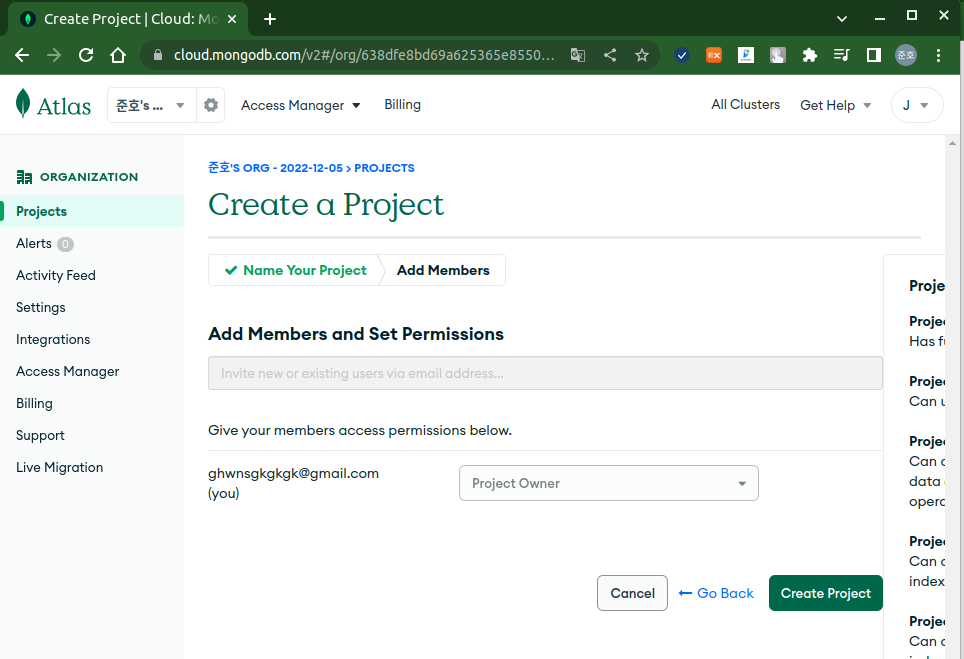
mogodb를 하나 만든다
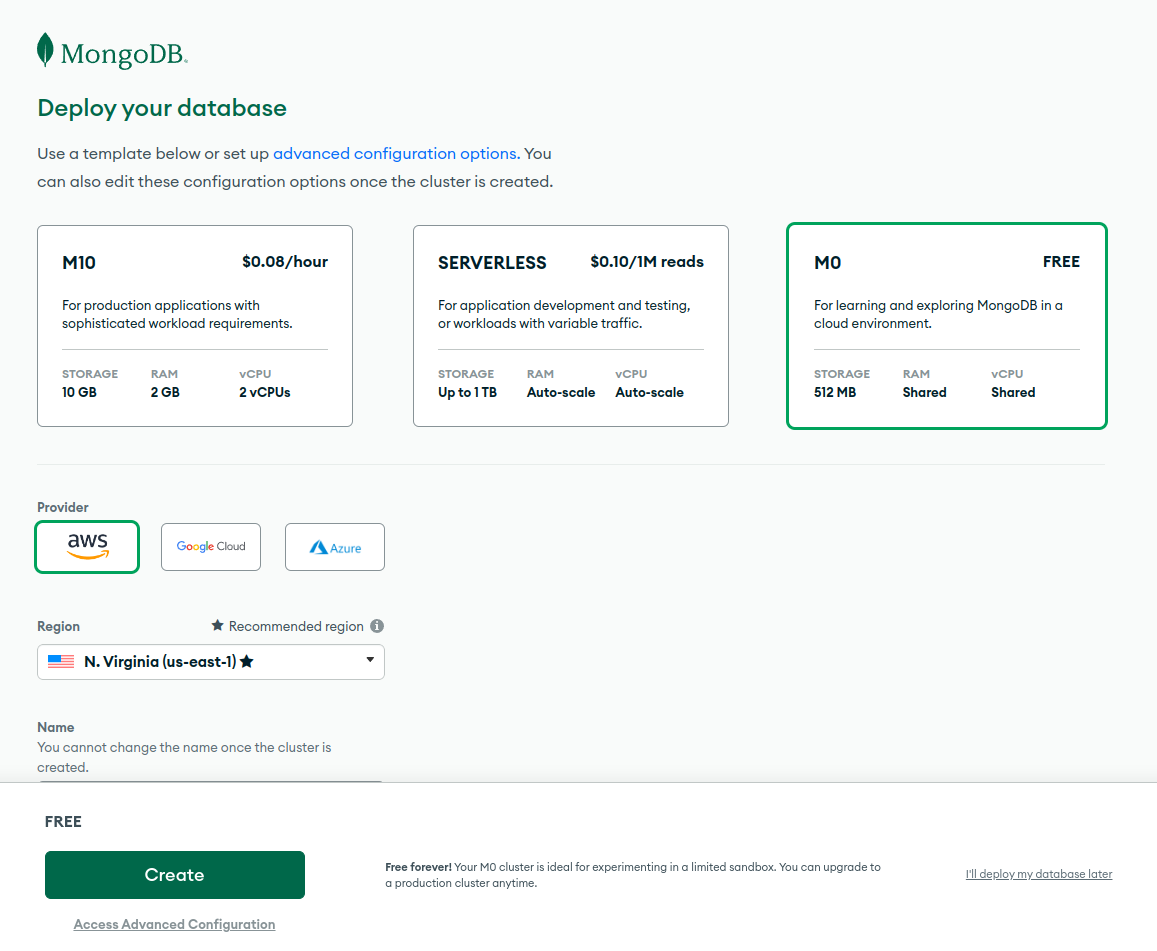
yarn add mongoose위에 mongodb 에서 중요한
mongodb+srv://?retryWrites=true&w=majority비밀번호를 잘 메모해두자
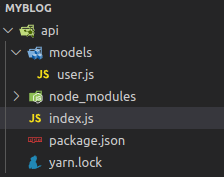
api / models / user.js
const mongoose = require('mongoose');


const UserSchema = new mongoose.Schema({
    username: { type: String, required: true, min: 4, unique: true },
    password: { type: String, required: true, }
});

const UserModel = mongoose.model('User', UserSchema);

module.exports = UserModel;
api / index.js
const express = require('express');
const cors = require('cors');
const { default: mongoose } = require('mongoose');
const User = require('./models/user');
const app = express();

app.use(cors())
app.use(express.json());

mongoose.connect('mongodb+srv://.mongodb.net/?retryWrites=true&w=majority');

app.post('/register', async(req, res) => {
    const { username, password } = req.body;
    await User.create({ username, password})

    res.json({ requestData: { username, password } });

});

app.listen(4000);
에러 메시지를 보면, E11000 duplicate key error collection: test.users index: username_1 dup key: { username: "test" } 이라고 나와 있습니다. 이는 중복된 username 값을 생성하려고 했기 때문에 발생한 에러입니다. 이 문제를 해결하려면 username 필드에 대한 인덱스를 설정하고, 이미 해당 username 값을 가진 사용자가 있는지 확인해야 합니다.
- api/models/user.js 파일에서 UserSchema 객체에 username 필드에 대한 인덱스를 추가합니다.
const UserSchema = new Schema({
  username: { type: String, required: true, min: 4, unique: true, index: true },
  password: { type: String, required: true }
});
2. api/index.js 파일에서 사용자 생성 전에 이미 해당 username 값을 가진 사용자가 있는지 확인합니다. 만약 이미 있는 경우 에러를 반환하도록 합니다.
app.post('/register', async (req, res) => {
  const { username, password } = req.body;
  const existingUser = await User.findOne({ username });
  if (existingUser) {
    return res.status(409).json({ error: 'Username already exists' });
  }
  const userDoc = await User.create({ username, password });
  res.json(userDoc);
});
이렇게 하면 username 값이 중복될 때, 409 Conflict HTTP 응답 코드와 함께 에러 메시지를 반환하게 됩니다.
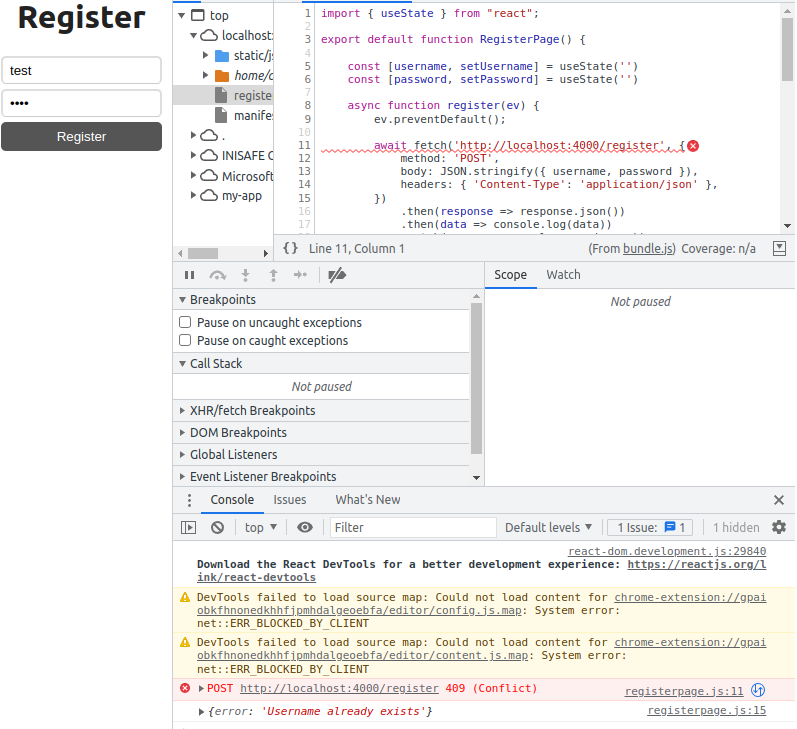
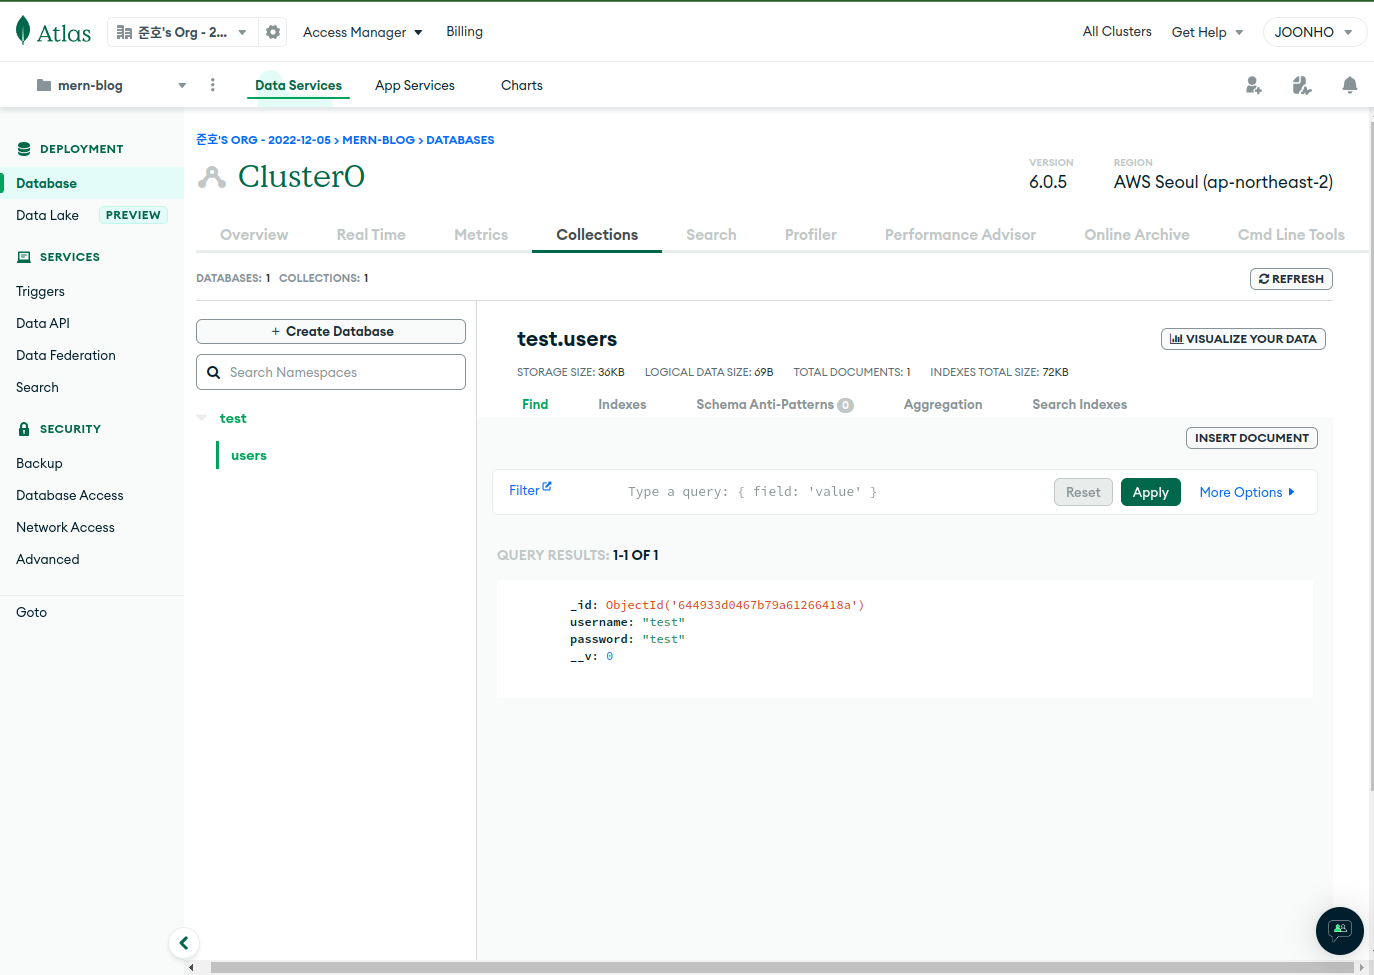
이렇게 test 값이 이미 들어 와 있었다 .
세심한 예외처리는 항상 중요하다 내가 어디로 가고 있는지 방향을 잡아주기 때문 !
동영상에도 예외처리 방법이 나와 있지만 나는 좀 다르게 했다.
https://yarnpkg.com/package/bcryptjs
https://yarnpkg.com/package/bcryptjs
Fast, reliable, and secure dependency management.
yarnpkg.com
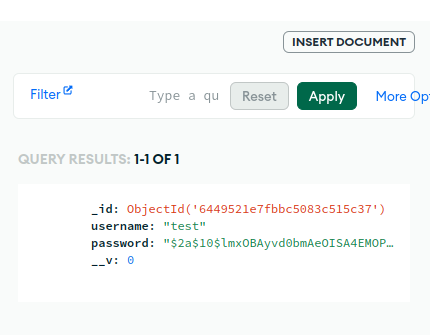
yarn add bcryptjsapi 파일 안에서 설치해준다.
const bcrypt = require('bcryptjs');
const salt = bcrypt.genSaltSync(10);
const express = require('express');
const cors = require('cors');
const { default: mongoose } = require('mongoose');
const User = require('./models/user');
const bcrypt = require('bcryptjs');
const salt = bcrypt.genSaltSync(10);
const app = express();
app.use(cors())
app.use(express.json());
mongoose.connect('mongodb+srv://.mongodb.net/test?retryWrites=true&w=majority')
.then(() => console.log('Connected to MongoDB'))
.catch(error => console.error(error));
app.post('/register', async (req, res) => {
const { username, password } = req.body;
const existingUser = await User.findOne({ username });
if (existingUser) {
return res.status(409).json({ error: 'Username already exists' });
}
try {
const userDoc = await User.create({
username,
password: bcrypt.hashSync(password, salt),
});
res.json(userDoc);
} catch (e) {
console.log(e);
res.status(400).json(e)
}
});
app.listen(4000, () => {
console.log("Server listening on port 4000")
});
loginpage.js
import { useState } from "react";

export default function LoginPage() {
    const [username, setUsername] = useState('');
    const [password, setPassword] = useState('');
    function login(ev) {
        ev.preventDefault();
        fetch('http://localhost:4000/login', {
            method: 'POST',
            body: JSON.stringify({ username, password }),
            headers: { 'Content-Type': 'application/json' },
        })
    }

    return (

        <form className="login" onSubmit={login}>
            <h1>Login</h1>
            <input type="text" placeholder="username" value={username} onChange={ev => setUsername(ev.target.value)} />
            <input type="password" placeholder="password" value={password} onChange={ev => setPassword(ev.target.value)} />
            <button>Login</button>
        </form>
    );
index.js
app.post('/login', async (req, res) => {
    const { username, password } = req.body;
    const userDoc = await User.findOne({ username });
    res.json(userDoc);

});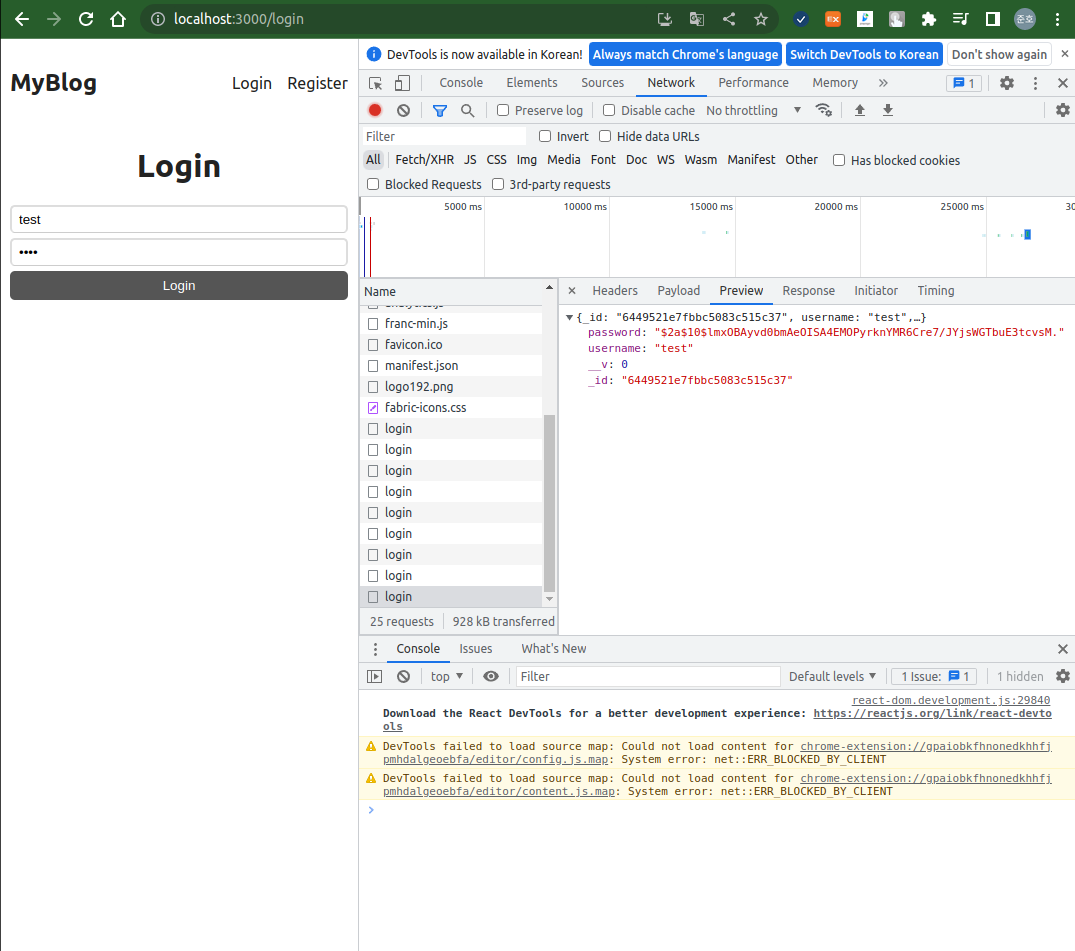
비밀번호 비교
// Load hash from your password DB.
bcrypt.compare("B4c0/\/", hash, function(err, res) {
    // res === true
});
요거 적용
app.post('/login', async (req, res) => {
    const { username, password } = req.body;
    const userDoc = await User.findOne({ username });
    res.json(userDoc);
    // Load hash from your password DB.
    bcrypt.compare(password, userDoc.password).then((res) => {
        console.log(res);
    })

});
결과 값 true !
https://yarnpkg.com/package/jsonwebtoken
https://yarnpkg.com/package/jsonwebtoken
Fast, reliable, and secure dependency management.
yarnpkg.com
yarn add jsonwebtokenconst express = require('express');
const cors = require('cors');
const { default: mongoose } = require('mongoose');
const User = require('./models/user');
const jwt = require('jsonwebtoken');
const secret = 'sdgse45egsdgfs54sdsgsd45sdfs';
const bcrypt = require('bcryptjs');
const salt = bcrypt.genSaltSync(10);
const app = express();
app.use(cors())
app.use(express.json());
mongoose.connect('mongodb+srv://ghwnsgkgk:tW1hhjpLx57NkUoB@cluster0.nt2e5j0.mongodb.net/test?retryWrites=true&w=majority')
.then(() => console.log('Connected to MongoDB'))
.catch(error => console.error(error));
app.post('/register', async (req, res) => {
const { username, password } = req.body;
const existingUser = await User.findOne({ username });
if (existingUser) {
return res.status(409).json({ error: 'Username already exists' });
}
try {
const userDoc = await User.create({
username,
password: bcrypt.hashSync(password, salt),
});
res.json(userDoc);
} catch (e) {
console.log(e);
res.status(400).json(e)
}
});
app.post('/login', async (req, res) => {
const { username, password } = req.body;
const userDoc = await User.findOne({ username });
// Load hash from your password DB.
const passOk = bcrypt.compareSync(password, userDoc.password)
if (passOk) {
//logged in
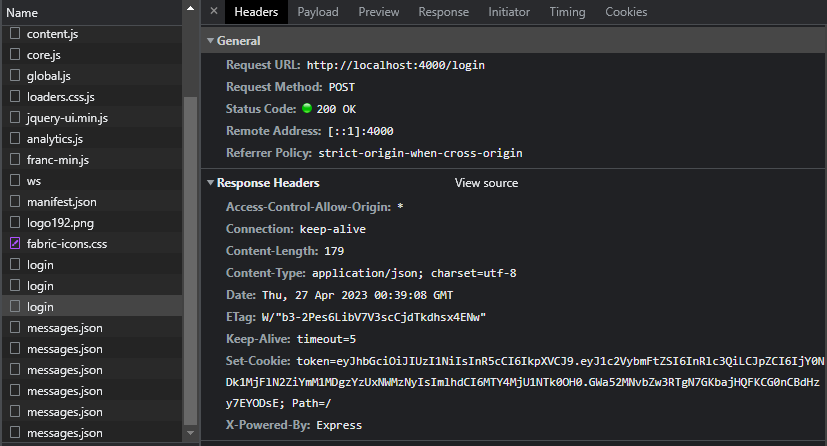
jwt.sign({ username, id: userDoc._id }, secret, {}, (err, token) => {
if (err) throw err;
res.cookie("token", token).json('ok : ' + token)
});
} else {
res.status(400).json('wrong credentials');
}
});
app.listen(4000, () => {
console.log("Server listening on port 4000")
});
//mongodb+srv://ghwnsgkgk:tW1hhjpLx57NkUoB@cluster0.nt2e5j0.mongodb.net/?retryWrites=true&w=majority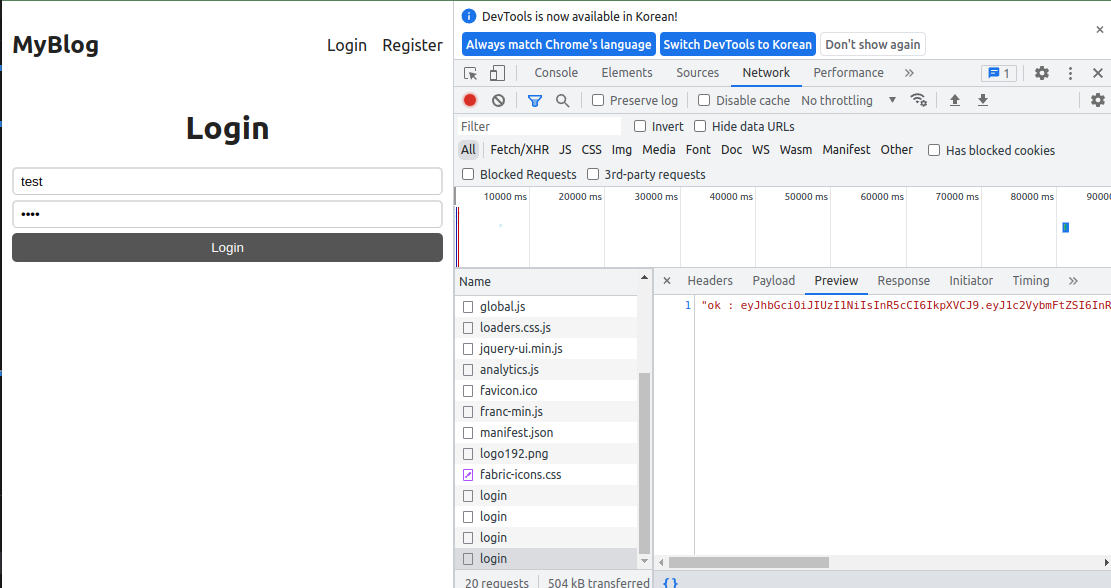
MongooseServerSelectionError: Could not connect to any servers in your MongoDB Atlas cluster. One common reason is that you're trying to access the database from an IP that isn't whitelisted. Make sure your current IP address is on your Atlas cluster's IP whitelist: https://www.mongodb.com/docs/atlas/security-whitelist/
    at _handleConnectionErrors (C:\Users\leejoonho\Desktop\my_portfolio_blog\api\node_modules\mongoose\lib\connection.js:755:11)
    at NativeConnection.openUri (C:\Users\leejoonho\Desktop\my_portfolio_blog\api\node_modules\mongoose\lib\connection.js:730:11) {
  reason: TopologyDescription {
    type: 'ReplicaSetNoPrimary',
    servers: Map(3) {
      'ac-q1w3yx8-shard-00-01.nt2e5j0.mongodb.net:27017' => [ServerDescription],
      'ac-q1w3yx8-shard-00-00.nt2e5j0.mongodb.net:27017' => [ServerDescription],
      'ac-q1w3yx8-shard-00-02.nt2e5j0.mongodb.net:27017' => [ServerDescription]
    },
    stale: false,
    compatible: true,
    heartbeatFrequencyMS: 10000,
    localThresholdMS: 15,
    setName: 'atlas-112z5i-shard-0',
    maxElectionId: null,
    maxSetVersion: null,
    commonWireVersion: 0,
    logicalSessionTimeoutMinutes: null
  },
  code: undefined
}
이런 에러가 뜨면 당황하지말고 mongoDB에 가서 개발자 IP주소를 등록해주면 된다.
다시 !
fetch('http://localhost:4000/login', {
            method: 'POST',
            body: JSON.stringify({ username, password }),
            headers: { 'Content-Type': 'application/json' },
            credentials: 'include',

        })


 >>>>>>>>>>   credentials: 'include'


 api/index.js

 >>>>>>>>>>    app.use(cors({credentials:true,origin:'http://localhost:3000'}))


 해당 내용을 추가 해줘야한다.
Cookie: ajs_user_id=%22662ac613-e0c4-5b3d-99e6-745771ad7d1a%22; ajs_anonymous_id=%22d10ea57a-f3f3-4df8-86b0-79a5299c30ba%22; token=eyJhbGciOiJIUzI1NiIsInR5cCI6IkpXVCJ9.eyJ1c2VybmFtZSI6InRlc3QiLCJpZCI6IjY0NDk1MjFlN2ZiYmM1MDgzYzUxNWMzNyIsImlhdCI6MTY4MjU1NjUxMn0.LlK4OwMn45W8iHBbgTVYpKoSK6jUkuCsVotXfF-3J_c그리고 login 페이지에 리다이렉션을 걸어준다.
client / pages / loginpage.js
import { useState } from "react";
import { Navigate } from "react-router-dom";

export default function LoginPage() {
    const [username, setUsername] = useState('');
    const [password, setPassword] = useState('');
    const [redirect, setRedirect] = useState(false);

    async function login(ev) {
        ev.preventDefault();
        const response = await fetch('http://localhost:4000/login', {
            method: 'POST',
            body: JSON.stringify({ username, password }),
            headers: { 'Content-Type': 'application/json' },
            credentials: 'include',

        });
        if (response.ok) {
            setRedirect(true)
        }
        else {
            alert('Wrong credentials');
        }
    }
    if (redirect) {
        return <Navigate to={'/'} />
    }
    return (

        <form className="login" onSubmit={login}>
            <h1>Login</h1>
            <input type="text" placeholder="username" value={username} onChange={ev => setUsername(ev.target.value)} />
            <input type="password" placeholder="password" value={password} onChange={ev => setPassword(ev.target.value)} />
            <button>Login</button>
        </form>
    );
}
https://yarnpkg.com/package/cookie-parser
https://yarnpkg.com/package/cookie-parser
Fast, reliable, and secure dependency management.
yarnpkg.com
yarn add cookie-parservscode 파일 찾기는 ctrl + p
api / index.js
**추가**

const cookieParser = require('cookie-parser')
app.use(cookieParser())
app.get('/profile', async (req, res) => {
    res.json(req.cookies);
});
const express = require('express');
const cors = require('cors');
const { default: mongoose } = require('mongoose');
const User = require('./models/user');
const jwt = require('jsonwebtoken');
const cookieParser = require('cookie-parser')
const secret = 'sdgse45egsdgfs54sdsgsd45sdfs';
const bcrypt = require('bcryptjs');
const salt = bcrypt.genSaltSync(10);
const app = express();
app.use(cors({ credentials: true, origin: 'http://localhost:3000' }))
app.use(express.json());
app.use(cookieParser())
mongoose.connect('mongodb+srv://ghwnsgkgk:tW1hhjpLx57NkUoB@cluster0.nt2e5j0.mongodb.net/test?retryWrites=true&w=majority')
.then(() => console.log('Connected to MongoDB'))
.catch(error => console.error(error));
app.post('/register', async (req, res) => {
const { username, password } = req.body;
const existingUser = await User.findOne({ username });
if (existingUser) {
return res.status(409).json({ error: 'Username already exists' });
}
try {
const userDoc = await User.create({
username,
password: bcrypt.hashSync(password, salt),
});
res.json(userDoc);
} catch (e) {
console.log(e);
res.status(400).json(e)
}
});
app.post('/login', async (req, res) => {
const { username, password } = req.body;
const userDoc = await User.findOne({ username });
// Load hash from your password DB.
const passOk = bcrypt.compareSync(password, userDoc.password)
if (passOk) {
//logged in
jwt.sign({ username, id: userDoc._id }, secret, {}, (err, token) => {
if (err) throw err;
res.cookie("token", token).json('ok : ' + token)
});
} else {
res.status(400).json('wrong credentials');
}
});
app.get('/profile', async (req, res) => {
res.json(req.cookies);
});
app.listen(4000, () => {
console.log("Server listening on port 4000")
});
//mongodb+srv://ghwnsgkgk:tW1hhjpLx57NkUoB@cluster0.nt2e5j0.mongodb.net/?retryWrites=true&w=majority
client / header.js
import { useEffect } from "react";
import { Link } from "react-router-dom";

export default function Header() {
    useEffect(()=>{
        fetch('http://localhost:4000/profile',{
            credentials:'include',
        })
    })
    return (
        <header>
            <Link to="/" className="logo">
                MyBlog
            </Link>
            <nav>
                <Link to="/login">Login</Link>
                <Link to="/register">Register</Link>

            </nav>
        </header>
    )
}
{ajs_user_id: ""662ac613-e0c4-5b3d-99e6-745771ad7d1a"",…}
ajs_anonymous_id
:
"\"d10ea57a-f3f3-4df8-86b0-79a5299c30ba\""
ajs_user_id
:
"\"662ac613-e0c4-5b3d-99e6-745771ad7d1a\""
token
:
"eyJhbGciOiJIUzI1NiIsInR5cCI6IkpXVCJ9.eyJ1c2VybmFtZSI6InRlc3QiLCJpZCI6IjY0NDk1MjFlN2ZiYmM1MDgzYzUxNWMzNyIsImlhdCI6MTY4MjU1NzEzNn0.YdV9lzvSTjp1DrPg0_FeE7CeUr2mfIX99IsFBx4Fy1I"
login 값과 동일한 token 확인 가능 !
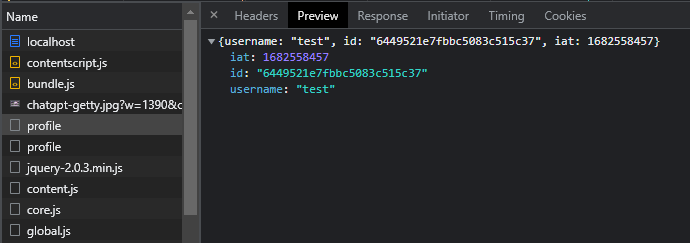
app.get('/profile', async (req, res) => {
    const { token } = req.cookies;
    jwt.verify(token, secret, {}, (err, info) => {
        if (err) throw err;
        res.json(info);
    })
});
jwt info
client / src / header.js
import { useEffect, useState } from "react";
import { Link } from "react-router-dom";

export default function Header() {
    const [username, setUsername] = useState(null);

    useEffect(() => {
        fetch('http://localhost:4000/profile', {
            credentials: 'include',
        }).then((response) => {
            response.json().then(userInfo => {
                setUsername(userInfo.username);
            });
        });
    }, []);


    function logout() {
        fetch('http://localhost:4000/logout', {
            credentials: 'include',
            method: 'POST',
        })
        setUsername(null);
    }


    return (
        <header>
            <Link to="/" className="logo">
                MyBlog
            </Link>
            <nav>
                {username &&
                    <>
                        <Link to='/create'>Create New Post</Link>
                        <a onClick={logout}>Logout</a>
                    </>
                }
                {!username &&
                    <>
                        <Link to="/login">Login</Link>
                        <Link to="/register">Register</Link>
                    </>
                }


            </nav>
        </header>
    )
}
api / index.js
app.post('/logout', (req, res) => {
    res.cookie('token', '').json('ok');
})
사용법?
const { createContext } = require("react");`createContext`는 React에서 상태 관리를 위한 컨텍스트(Context)를 생성하는 함수입니다. 컨텍스트는 전역적으로 데이터를 공유하거나, 컴포넌트 간에 데이터를 전달하는 데 사용됩니다.
`createContext` 함수는 초기값을 매개변수로 받습니다. 이 초기값은 컨텍스트의 Provider에서 제공하는 값이며, 컨텍스트를 사용하는 컴포넌트들은 이 값을 참조하여 업데이트된 값을 사용할 수 있습니다.
예를 들어, 다음과 같이 사용할 수 있습니다.
```
// ThemeContext.js

import { createContext } from 'react';

const ThemeContext = createContext('light');

export default ThemeContext;
```
위 코드에서 `createContext` 함수를 사용하여 `ThemeContext`를 생성하고, 초기값을 `'light'`로 설정했습니다. 이제 `ThemeContext`를 사용하는 컴포넌트에서는 `ThemeContext.Provider`를 통해 값을 전달하고, `ThemeContext.Consumer`를 통해 값을 참조할 수 있습니다.
```
// App.js

import React from 'react';
import ThemeContext from './ThemeContext';
import Header from './Header';
import Main from './Main';
import Footer from './Footer';

function App() {
  return (
    <ThemeContext.Provider value="dark">
      <Header />
      <Main />
      <Footer />
    </ThemeContext.Provider>
  );
}

export default App;
```
위 코드에서 `ThemeContext.Provider`를 사용하여 값을 전달하고 있습니다. `Header`, `Main`, `Footer` 컴포넌트에서는 `ThemeContext.Consumer`를 사용하여 값을 참조할 수 있습니다.
컨텍스트는 상태 관리를 위한 Redux나 MobX와 같은 라이브러리보다는 간단한 상태 관리에 적합합니다. 하지만, 컨텍스트를 사용하면 컴포넌트 간의 데이터 전달이 간편해지므로 상황에 따라서 유용하게 사용될 수 있습니다.
다음 할꺼는 바로 로그인 되도록하기
client / src / usercontext.js
const { createContext, useState } = require("react");

export const UserContext = createContext({});

export function UserContextProvider({ children }) {

    const [userInfo, setUserInfo] = useState({});

    return (

        <UserContext.Provider value={{ userInfo, setUserInfo }}>
            {children}
        </UserContext.Provider>


    );
}
loginpage.js
import { useContext, useState } from "react";
import { Navigate } from "react-router-dom";
import { UserContext } from "../usercontext";

export default function LoginPage() {
    const [username, setUsername] = useState('');
    const [password, setPassword] = useState('');
    const [redirect, setRedirect] = useState(false);
    const { setUserInfo } = useContext(UserContext);

    async function login(ev) {
        ev.preventDefault();
        const response = await fetch('http://localhost:4000/login', {
            method: 'POST',
            body: JSON.stringify({ username, password }),
            headers: { 'Content-Type': 'application/json' },
            credentials: 'include',

        });
        if (response.ok) {
            response.json().then(userInfo => {
                setUserInfo(userInfo)
                setRedirect(true);
            })

        }
        else {
            alert('Wrong credentials');
        }
    }
    if (redirect) {
        return <Navigate to={'/'} />
    }
    return (

        <form className="login" onSubmit={login}>
            <h1>Login</h1>
            <input type="text" placeholder="username" value={username} onChange={ev => setUsername(ev.target.value)} />
            <input type="password" placeholder="password" value={password} onChange={ev => setPassword(ev.target.value)} />
            <button>Login</button>
        </form>
    );
}
api / index.js
app.post('/login', async (req, res) => {
    const { username, password } = req.body;
    const userDoc = await User.findOne({ username });
    // Load hash from your password DB.
    const passOk = bcrypt.compareSync(password, userDoc.password)
    if (passOk) {
        //logged in
        jwt.sign({ username, id: userDoc._id }, secret, {}, (err, token) => {

            if (err) throw err;
            res.cookie("token", token).json({
                id: userDoc._id,
                username,
            });

        });

    } else {
        res.status(400).json('wrong credentials');
    }

});
이부분 잘 이해가 안된다. ! 추후에 확인
https://yarnpkg.com/package/react-quill
https://yarnpkg.com/package/react-quill
Fast, reliable, and secure dependency management.
yarnpkg.com
yarn add react-quillimport { useState } from 'react';
import ReactQuill from 'react-quill';
import 'react-quill/dist/quill.snow.css';
const modules = {
toolbar: [
[{ 'header': [1, 2, false] }],
['bold', 'italic', 'underline', 'strike', 'blockquote'],
[{ 'list': 'ordered' }, { 'list': 'bullet' }, { 'indent': '-1' }, { 'indent': '+1' }],
['link', 'image'],
['clean']
],
};
const formats = [
'header',
'bold', 'italic', 'underline', 'strike', 'blockquote',
'list', 'bullet', 'indent',
'link', 'image'
]
export default function CreatePost() {
const [title, setTitle] = useState('');
const [summary, setSummary] = useState('');
const [content, setContent] = useState('');
const [files, setFiles] = useState('');
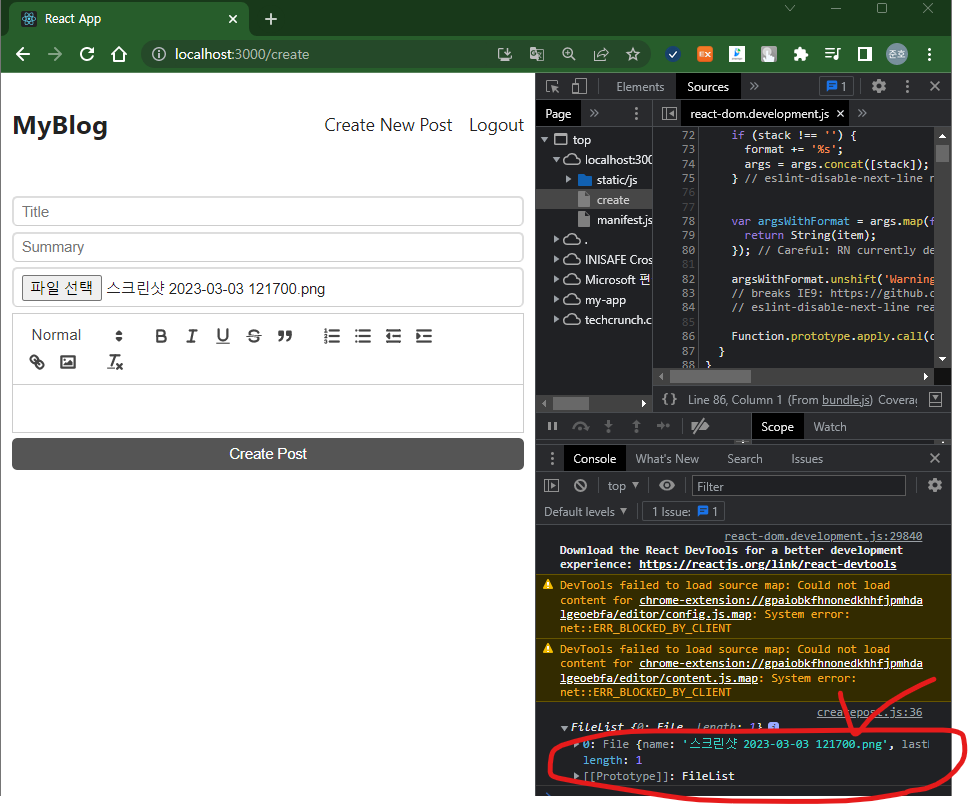
function createNewPost(ev) {
const data = new FormData();
data.set('title', title);
data.set('summary', summary);
data.set('content', content);
ev.preventDefault();
console.log(files)
}
return (
<form onSubmit={createNewPost}>
<input
type="title"
placeholder={'Title'}
value={title}
onChange={ev => setTitle(ev.target.value)} />
<input
type="summary"
placeholder={'Summary'}
value={summary}
onChange={ev => setSummary(ev.target.value)} />
<input type="file"
onChange={ev => setFiles(ev.target.files)} />
<ReactQuill
value={content}
onChange={newValue => setContent(newValue)}
modules={modules}
formats={formats} />
<button style={{ marginTop: '5px' }}>Create Post</button>
</form>
)
}
https://yarnpkg.com/package/multer
https://yarnpkg.com/package/multer
Fast, reliable, and secure dependency management.
yarnpkg.com
yarn add multerindex.js 추가
const multer = require('multer')
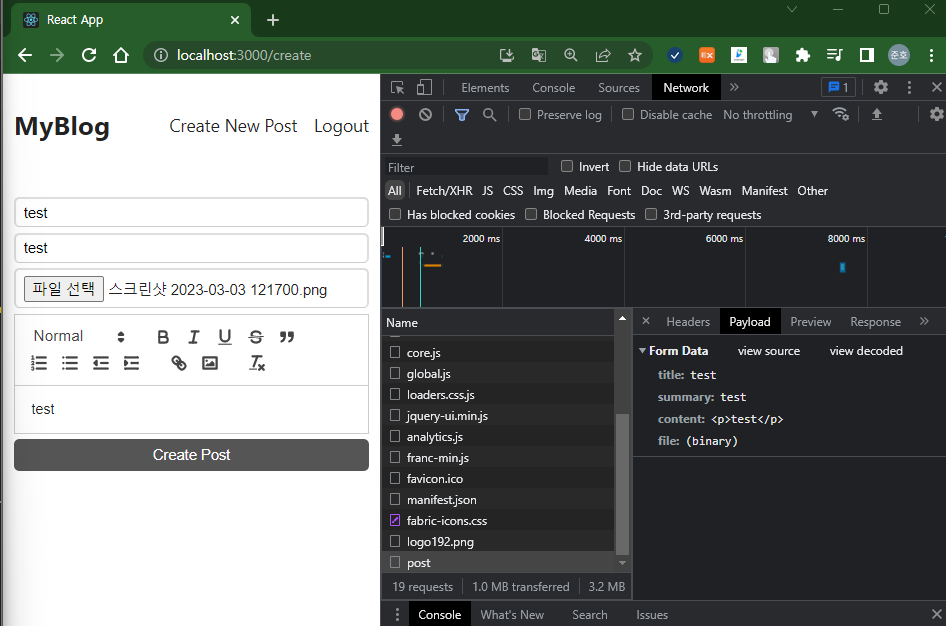
const uploadMiddleware = multer({ dest: 'uploads/' })// createpost data.set 하고 맞춰야해
app.post('/post', uploadMiddleware.single('file'), (req, res) => {
res.json(req.files);
})const express = require('express');
const cors = require('cors');
const { default: mongoose } = require('mongoose');
const User = require('./models/user');
const jwt = require('jsonwebtoken');
const cookieParser = require('cookie-parser')
const multer = require('multer')
const uploadMiddleware = multer({ dest: 'uploads/' })
const secret = 'sdgse45egsdgfs54sdsgsd45sdfs';
const bcrypt = require('bcryptjs');
const salt = bcrypt.genSaltSync(10);
const app = express();
app.use(cors({ credentials: true, origin: 'http://localhost:3000' }))
app.use(express.json());
app.use(cookieParser())
mongoose.connect('mongodb+srv://ghwnsgkgk:tW1hhjpLx57NkUoB@cluster0.nt2e5j0.mongodb.net/test?retryWrites=true&w=majority')
.then(() => console.log('Connected to MongoDB'))
.catch(error => console.error(error));
app.post('/register', async (req, res) => {
const { username, password } = req.body;
const existingUser = await User.findOne({ username });
if (existingUser) {
return res.status(409).json({ error: 'Username already exists' });
}
try {
const userDoc = await User.create({
username,
password: bcrypt.hashSync(password, salt),
});
res.json(userDoc);
} catch (e) {
console.log(e);
res.status(400).json(e)
}
});
app.post('/login', async (req, res) => {
const { username, password } = req.body;
const userDoc = await User.findOne({ username });
// Load hash from your password DB.
const passOk = bcrypt.compareSync(password, userDoc.password)
if (passOk) {
//logged in
jwt.sign({ username, id: userDoc._id }, secret, {}, (err, token) => {
if (err) throw err;
res.cookie("token", token).json({
id: userDoc._id,
username,
});
});
} else {
res.status(400).json('wrong credentials');
}
});
app.get('/profile', (req, res) => {
const { token } = req.cookies;
jwt.verify(token, secret, {}, (err, info) => {
if (err) throw err;
res.json(info);
});
});
app.post('/logout', (req, res) => {
res.cookie('token', '').json('ok');
})
// createpost data.set 하고 맞춰야해
app.post('/post', uploadMiddleware.single('file'), (req, res) => {
    res.json(req.files);
})
app.listen(4000, () => {
console.log("Server listening on port 4000")
});
//mongodb+srv://ghwnsgkgk:tW1hhjpLx57NkUoB@cluster0.nt2e5j0.mongodb.net/?retryWrites=true&w=majority
createpost.js
import { useState } from 'react';
import ReactQuill from 'react-quill';
import 'react-quill/dist/quill.snow.css';


const modules = {
    toolbar: [
        [{ 'header': [1, 2, false] }],
        ['bold', 'italic', 'underline', 'strike', 'blockquote'],
        [{ 'list': 'ordered' }, { 'list': 'bullet' }, { 'indent': '-1' }, { 'indent': '+1' }],
        ['link', 'image'],
        ['clean']
    ],
};
const formats = [
    'header',
    'bold', 'italic', 'underline', 'strike', 'blockquote',
    'list', 'bullet', 'indent',
    'link', 'image'
]


export default function CreatePost() {

    const [title, setTitle] = useState('');
    const [summary, setSummary] = useState('');
    const [content, setContent] = useState('');
    const [files, setFiles] = useState('');
    async function createNewPost(ev) {

        const data = new FormData();
        data.set('title', title);
        data.set('summary', summary);
        data.set('content', content);
        data.set('file', files[0]);
        ev.preventDefault();

        const response = await fetch('http://localhost:4000/post', {
            method: 'POST',
            body: data,
        })
    }

    return (
        <form onSubmit={createNewPost}>
            <input
                type="title"
                placeholder={'Title'}
                value={title}
                onChange={ev => setTitle(ev.target.value)} />
            <input
                type="summary"
                placeholder={'Summary'}
                value={summary}
                onChange={ev => setSummary(ev.target.value)} />
            <input type="file"
                onChange={ev => setFiles(ev.target.files)} />

            <ReactQuill
                value={content}
                onChange={newValue => setContent(newValue)}
                modules={modules}
                formats={formats} />
            <button style={{ marginTop: '5px' }}>Create Post</button>


        </form>
    )
}
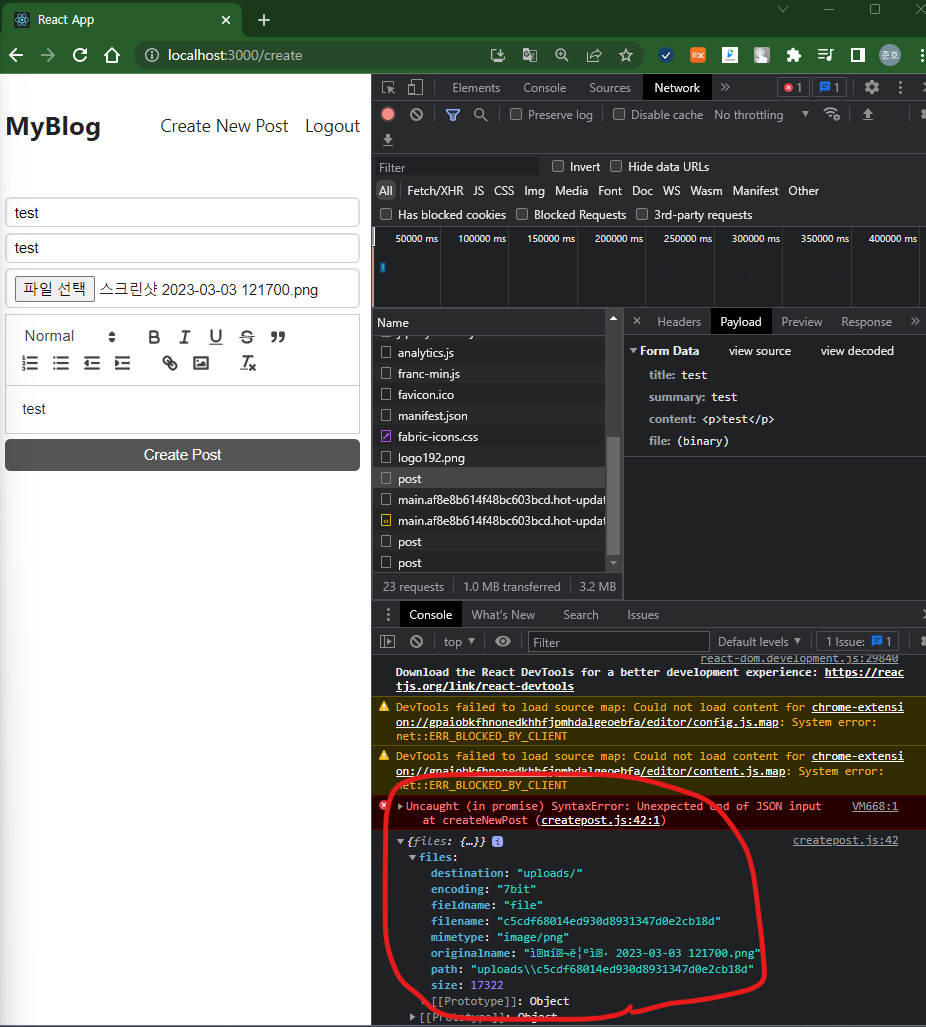
// createpost data.set 하고 맞춰야해
app.post('/post', uploadMiddleware.single('file'), (req, res) => {
    res.json({ files: req.file });
})
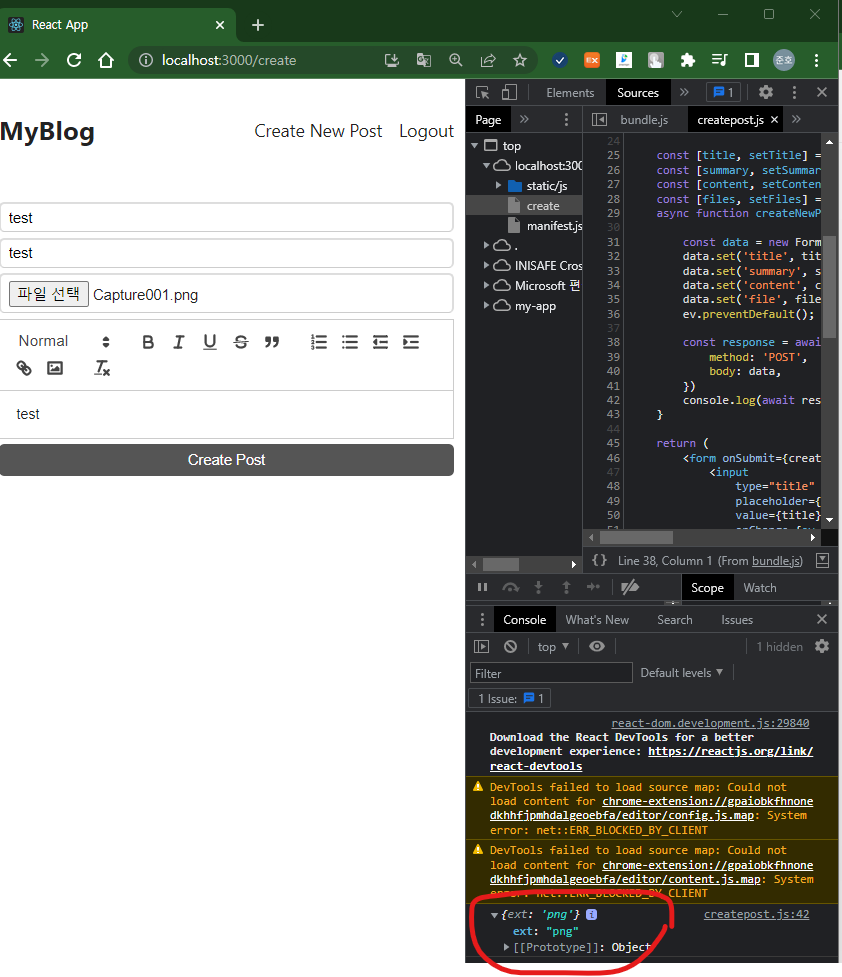
// createpost data.set 하고 맞춰야해
app.post('/post', uploadMiddleware.single('file'), (req, res) => {
    const { originalname } = req.file;
    const parts = originalname.split('.');
    const ext = parts[parts.length - 1];
    res.json({ ext });
})
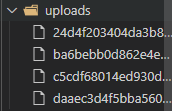
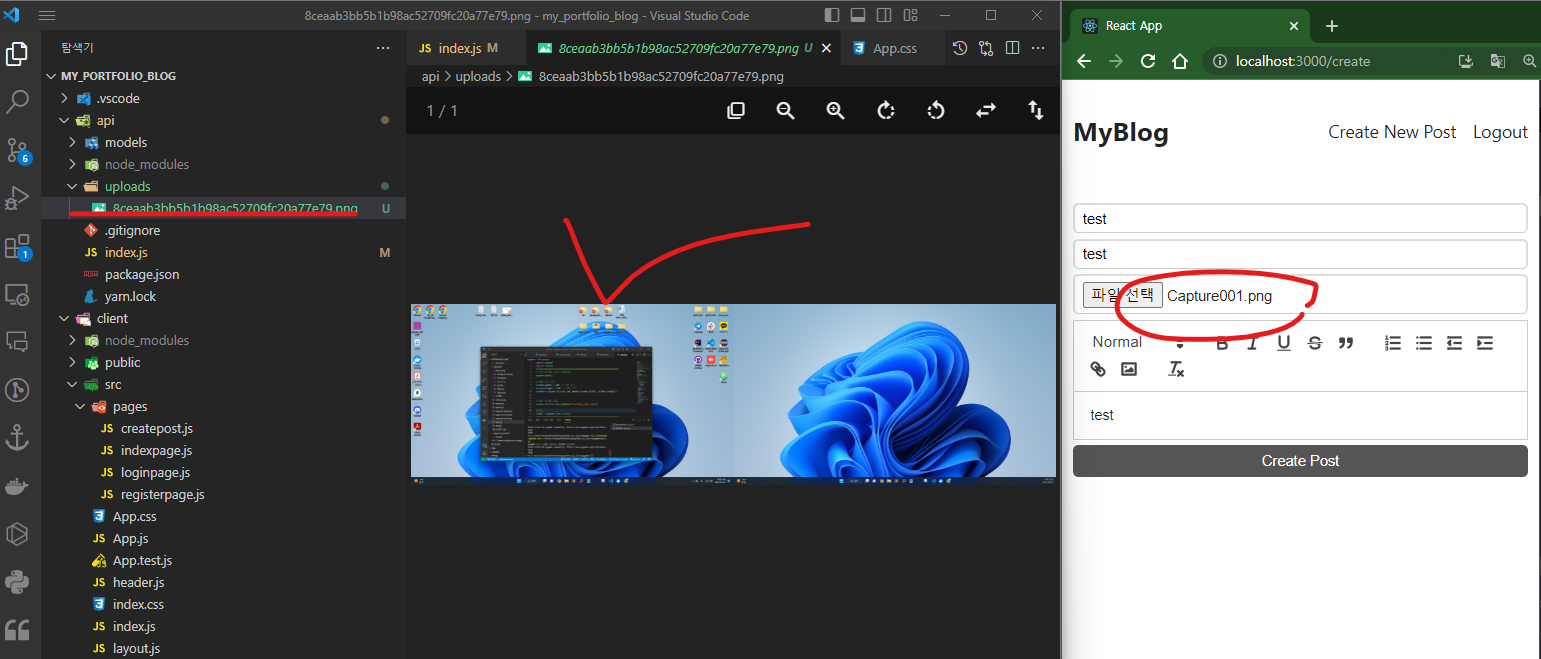
upload 파일 이미지 저
// createpost data.set 하고 맞춰야해
app.post('/post', uploadMiddleware.single('file'), (req, res) => {
    const { originalname, path } = req.file;
    const parts = originalname.split('.');
    const ext = parts[parts.length - 1];
    fs.renameSync(path, path + '.' + ext)
    res.json({ ext });
})
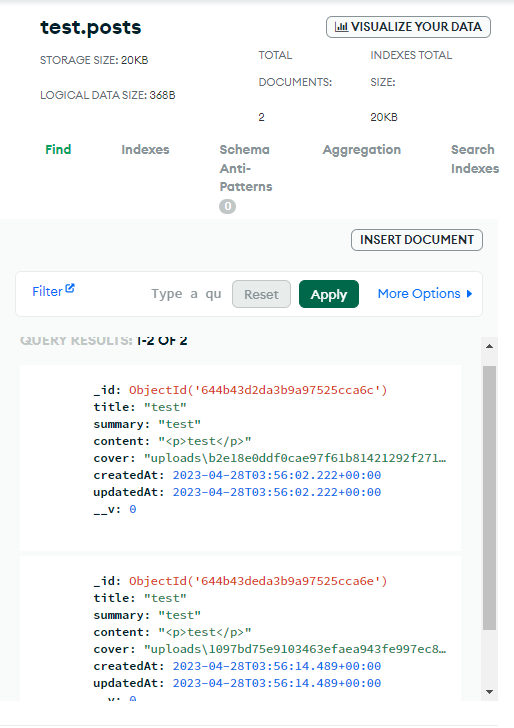
이제 작성한 post를 DB로 보내야하니까 model을 만들어준다
api / model / post
const mongoose = require('mongoose');
const { Schema, model } = mongoose;
const UserSchema = new Schema({
username: { type: String, required: true, min: 4, unique: true, index: true },
password: { type: String, required: true, }
});
const UserModel = model('User', UserSchema);
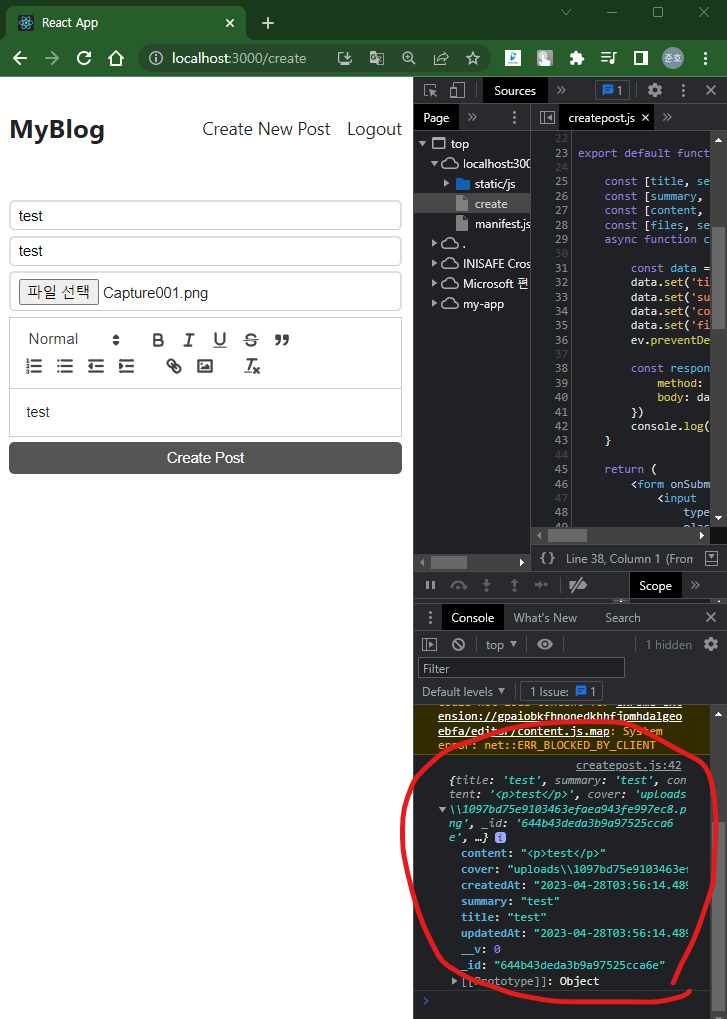
module.exports = UserModel;index.js post api
// createpost data.set 하고 맞춰야해
app.post('/post', uploadMiddleware.single('file'), async (req, res) => {
    const { originalname, path } = req.file;
    const parts = originalname.split('.');
    const ext = parts[parts.length - 1];
    const newPath = path + '.' + ext
    fs.renameSync(path, newPath)

    const { title, summary, content } = req.body
    const postDoc = await Post.create({
        title: title,
        summary: summary,
        content: content,
        cover: newPath,
    })
    res.json(postDoc);
})
indexpage.js
import { useEffect } from "react";
import Post from "../post";

export default function IndexPage() {

    useEffect(() => {
        fetch('http://localhost:4000/post').then(response => {
            response.json().then(posts => {
                console.log(posts)
            });
        });
    }, [])
    return (
        <>
            <Post />
            <Post />
            <Post />
        </>
    );
}
index.js
app.get('/post', async (req, res) => {
    const posts = await Post.find();
    res.json(posts)
})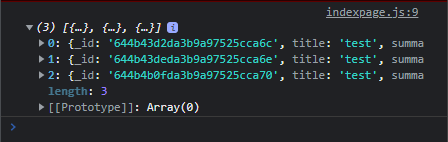
indexpage.js
import { useEffect, useState } from "react";
import Post from "../post";

export default function IndexPage() {

    const [posts, setPosts] = useState('')

    useEffect(() => {
        fetch('http://localhost:4000/post').then(response => {
            response.json().then(posts => {
                setPosts(posts);
            });
        });
    }, [])
    return (
        <>
            {posts.length > 0 && posts.map(post => (
                <Post {...post} />
            ))}
        </>
    );
}
client / post.js
export default function Post({ title, summary, content, cover, createdAt }) {


    return (
        <div className="post">

            <div className="image">
                <img src="https://techcrunch.com/wp-content/uploads/2023/03/chatgpt-getty.jpg?w=1390&crop=1" alt="" />
            </div>

            <div className="texts">
                <h2>{title}</h2>
                <p className="info">
                    <a className="author">Lee</a>
                    <time>{createdAt}</time>
                </p>
                <p className="summary">{summary}</p>
            </div>

        </div>
    );

}
https://yarnpkg.com/package/react-time-ago
https://yarnpkg.com/package/react-time-ago
Fast, reliable, and secure dependency management.
yarnpkg.com
https://yarnpkg.com/package/date-fns
https://yarnpkg.com/package/date-fns
Fast, reliable, and secure dependency management.
yarnpkg.com
client 쪽에 설치 !
yarn add date-fnshttps://date-fns.org/docs/Getting-Started
Modern JavaScript Date Utility Library
date-fns provides the most comprehensive yet simple and consistent toolset for manipulating JavaScript dates in a browser & Node.js.
date-fns.org
client / post.js
import { compareAsc, format, formatISO9075 } from 'date-fns'
export default function Post({ title, summary, content, cover, createdAt }) {


    return (
        <div className="post">

            <div className="image">
                <img src="https://techcrunch.com/wp-content/uploads/2023/03/chatgpt-getty.jpg?w=1390&crop=1" alt="" />
            </div>

            <div className="texts">
                <h2>{title}</h2>
                <p className="info">
                    <a className="author">{ }</a>
                    <time>{formatISO9075(new Date(createdAt))}</time>
                </p>
                <p className="summary">{summary}</p>
            </div>

        </div>
    );

}
api / index.js
// createpost data.set 하고 맞춰야해
app.post('/post', uploadMiddleware.single('file'), async (req, res) => {

    const { originalname, path } = req.file;
    const parts = originalname.split('.');
    const ext = parts[parts.length - 1];
    const newPath = path + '.' + ext
    fs.renameSync(path, newPath)

    const { token } = req.cookies;

    jwt.verify(token, secret, {}, async (err, info) => {
        if (err) throw err;
        const { title, summary, content } = req.body
        const postDoc = await Post.create({
            title: title,
            summary: summary,
            content: content,
            cover: newPath,
            author: info.id,
        });

        res.json(postDoc);
    });

});
app.get('/post', async (req, res) => {
    const posts = await Post.find();
    res.json(posts)
})
post 에 작성자 명을 넣어줄려고한다.
model / post.js
const mongoose = require('mongoose')
const { Schema, model } = mongoose;
const PostSchema = new Schema({
    title: String,
    summary: String,
    content: String,
    cover: String,
    author: { type: Schema.Types.ObjectId, ref: 'User' },
}, {
    timestamps: true,
});


const PostModel = model('Post', PostSchema)

module.exports = PostModel;
createpost.js
export default function CreatePost() {

    const [title, setTitle] = useState('');
    const [summary, setSummary] = useState('');
    const [content, setContent] = useState('');
    const [files, setFiles] = useState('');
    const [redirect, setRedirect] = useState(false);
    async function createNewPost(ev) {

        const data = new FormData();
        data.set('title', title);
        data.set('summary', summary);
        data.set('content', content);
        data.set('file', files[0]);
        ev.preventDefault();

        const response = await fetch('http://localhost:4000/post', {
            method: 'POST',
            body: data,
            credentials: 'include',
        });
        if (response.ok) {
            setRedirect(true)
        }
    }
    if (redirect) {
        return <Navigate to={'/'} />
    }
credentials : 'include' 추가
DB에 author 항목 추가
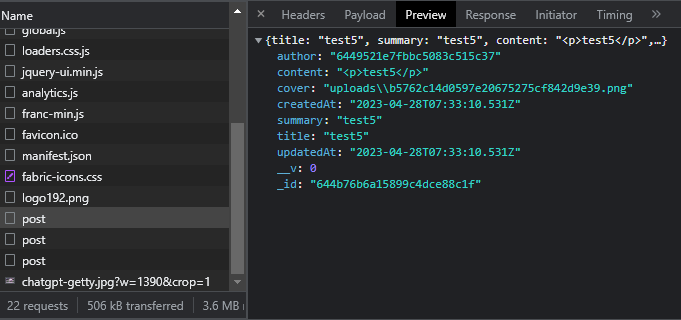
app.get('/post', async (req, res) => {
const posts = await Post.find().populate('author');
res.json(posts)
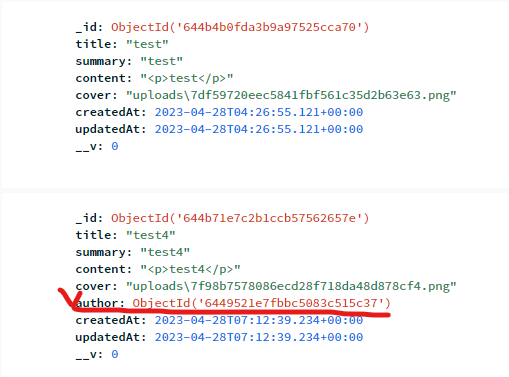
})해당 author 코드 추출
[{_id: "644b71e7c2b1ccb57562657e", title: "test4", summary: "test4", content: "<p>test4</p>",…},…]
0
:
{_id: "644b71e7c2b1ccb57562657e", title: "test4", summary: "test4", content: "<p>test4</p>",…}
1
:
{_id: "644b76b6a15899c4dce88c1f", title: "test5", summary: "test5", content: "<p>test5</p>",…}
cover image 등록
client / post.js
import { compareAsc, format, formatISO9075 } from 'date-fns';
import { Link } from 'react-router-dom';
export default function Post({ _id, title, summary, content, cover, createdAt, author }) {
return (
<div className="post">
<div className="image">
<Link to={`/post/${_id}`}>
<img src={'http://localhost:4000/' + cover} alt="" />
</Link>
</div>
<div className="texts">
<Link to={`/post/${_id}`}>
<h2>{title}</h2>
</Link>
<p className="info">
<a className="author">{author.username}</a>
<time>{formatISO9075(new Date(createdAt))}</time>
</p>
<p className="summary">{summary}</p>
</div>
</div>
);
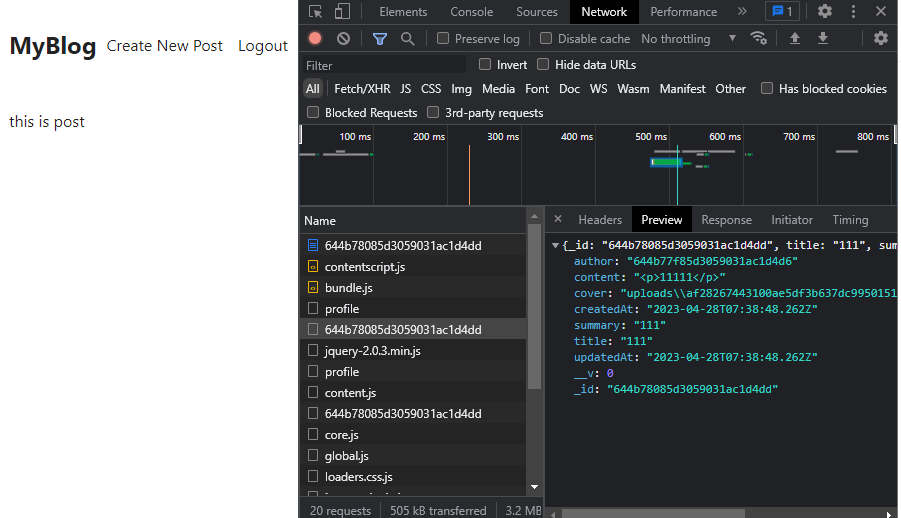
}<img src={'http://localhost:4000/' + cover} alt="" />api / index.js
app.use('/uploads', express.static(__dirname + '/uploads'));
add postpage.js
import { useEffect, useState } from "react"
import { useParams } from "react-router-dom"

export default function PostPage() {

    const { id } = useParams();
    const [postInfo, setPostInfo] = useState(null);
    useEffect(() => {

        fetch(`http://localhost:4000/post/${id}`)
            .then(response => {
                response.json().then(postInfo => {
                    setPostInfo(postInfo)
                });
            });

    }, []);
    return (
        <>post page</>
    )
}
api / index.js
app.get('/post/:id', async (req, res) => {
    const { id } = req.params

    const postDoc = await Post.findById(id);
    res.json(postDoc)
});
postpage.js
import { formatISO9075 } from "date-fns";
import { useContext, useEffect, useState } from "react"
import { Link, useParams } from "react-router-dom"
import { UserContext } from '../usercontext';
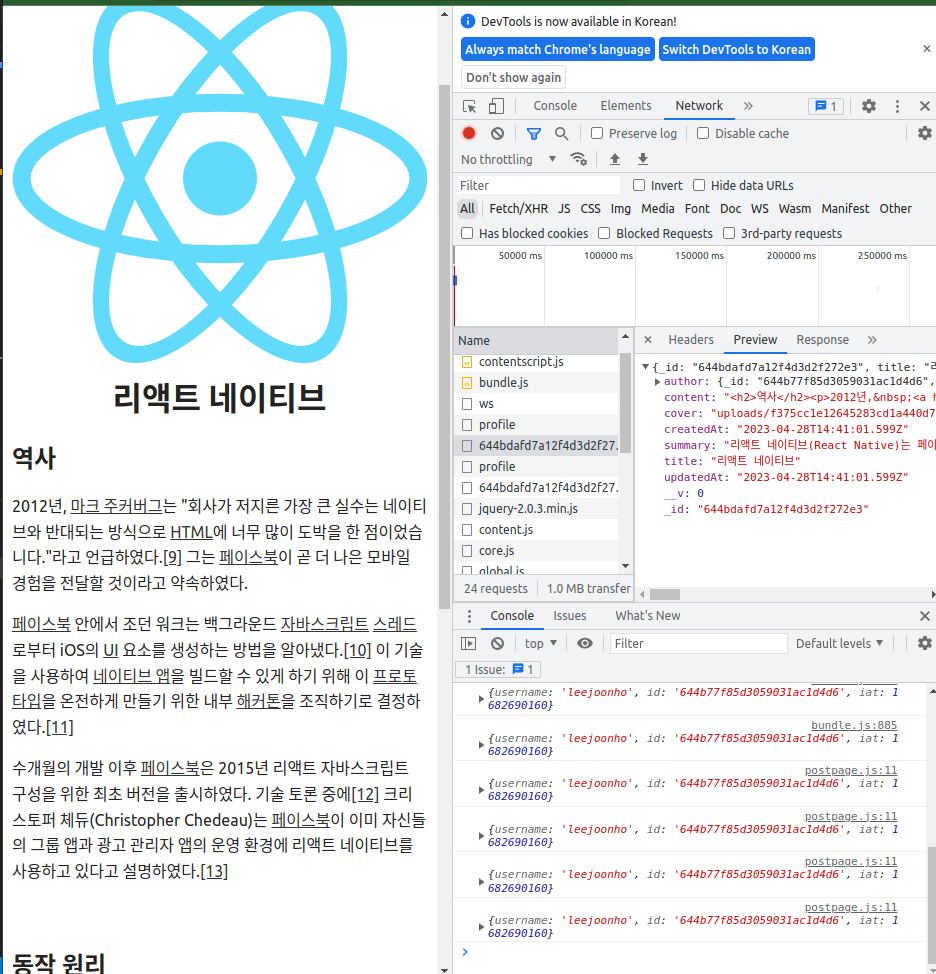
export default function PostPage() {
const { id } = useParams();
const [postInfo, setPostInfo] = useState(null);
const { userInfo } = useContext(UserContext)
console.log(userInfo)
useEffect(() => {
fetch(`http://localhost:4000/post/${id}`)
.then(response => {
response.json().then(postInfo => {
setPostInfo(postInfo)
});
});
}, []);
if (!postInfo) {
return '';
}
return (
<>
<div className="post-page">
<div className="image">
<img src={`http://localhost:4000/${postInfo.cover}`} alt=""></img>
</div>
<h1>{postInfo.title}</h1>
<div className="content" dangerouslySetInnerHTML={{ __html: postInfo.content }} />
<time>{formatISO9075(new Date(postInfo.createdAt))}</time>
<div className="author">by {postInfo.author.username}</div>
{userInfo.id === postInfo.author._id && (
<div className="edit-row">
<Link className="edit-btn" to={`/edit/${postInfo._id}`}>
<svg xmlns="http://www.w3.org/2000/svg" fill="none" viewBox="0 0 24 24" strokeWidth={1.5} stroke="currentColor" className="w-6 h-6">
<path strokeLinecap="round" strokeLinejoin="round" d="M16.862 4.487l1.687-1.688a1.875 1.875 0 112.652 2.652L10.582 16.07a4.5 4.5 0 01-1.897 1.13L6 18l.8-2.685a4.5 4.5 0 011.13-1.897l8.932-8.931zm0 0L19.5 7.125M18 14v4.75A2.25 2.25 0 0115.75 21H5.25A2.25 2.25 0 013 18.75V8.25A2.25 2.25 0 015.25 6H10" />
</svg>
Edit
</Link>
</div>)}
</div>
</>
)
}
http://localhost:3000/edit/644bdafd7a12f4d3d2f272e3
editpost.js
import { useEffect, useState } from 'react';
import { Navigate, useParams } from 'react-router-dom';
import Editor from '../editor';


export default function EditPost() {

    const { id } = useParams();
    const [title, setTitle] = useState('');
    const [summary, setSummary] = useState('');
    const [content, setContent] = useState('');
    const [files, setFiles] = useState('');
    const [redirect, setRedirect] = useState(false);

    useEffect(() => {

        fetch('http://localhost:4000/post/' + id)
            .then(response => {
                response.json().then(postInfo => {
                    setTitle(postInfo.title);
                    setContent(postInfo.content);
                    setSummary(postInfo.summary);
                })
            })

    }, [])

    async function updatePost(ev) {

        ev.preventDefault();

        const data = new FormData();

        data.set('title', title);

        data.set('summary', summary);

        data.set('content', content);

        if (files?.[0]) {

            data.set('file', files?.[0]);
        }

        const response = await fetch('http://localhost:4000/post', {
            method: 'PUT',
            body: data,
        });
        if (response.ok) {
            setRedirect(true)
        }

    }
    if (redirect) {
        return <Navigate to={`/post/${id}`} />
    }

    return (
        <form onSubmit={updatePost}>
            <input
                type="title"
                placeholder={'Title'}
                value={title}
                onChange={ev => setTitle(ev.target.value)} />
            <input
                type="summary"
                placeholder={'Summary'}
                value={summary}
                onChange={ev => setSummary(ev.target.value)} />
            <input type="file"
                onChange={ev => setFiles(ev.target.files)} />

            <Editor onChange={setContent} value={content} />
            <button style={{ marginTop: '5px' }}>Update Post</button>
        </form>)
}
index.js put api
app.put('/post', uploadMiddleware.single('file'), async (req, res) => {


    res.json({ test: 4, fileIs: req.file })

});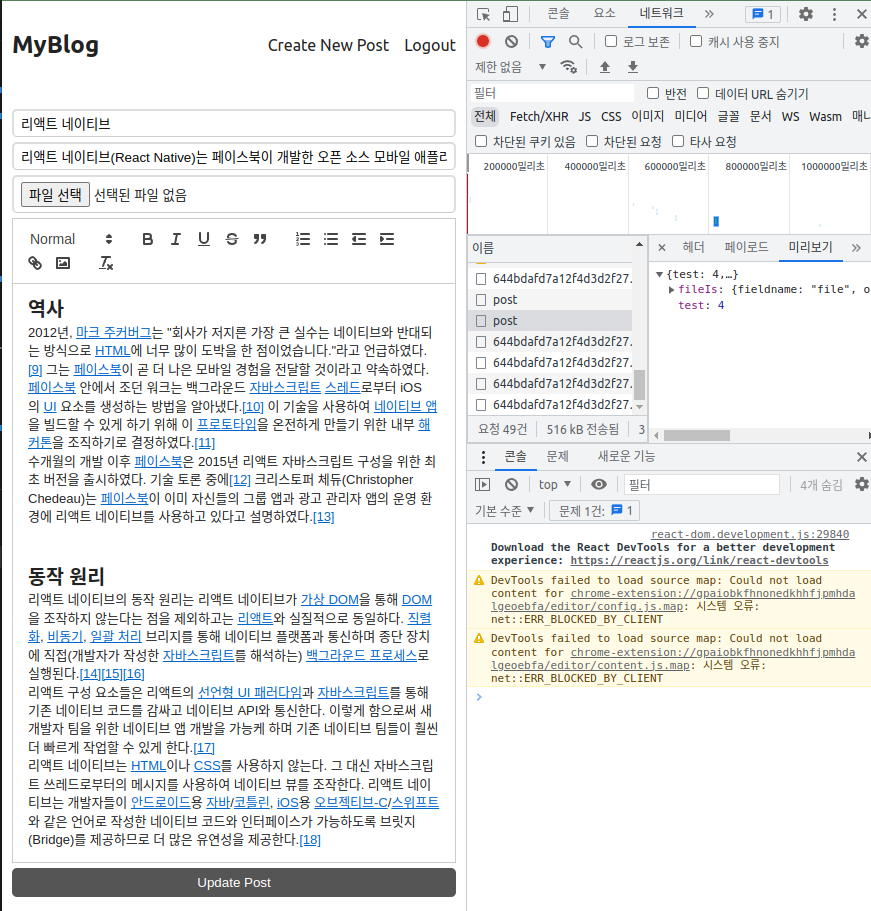
{test: 4,…}
fileIs
:
{fieldname: "file", originalname: "ì¤í¬ë¦°ì· 2023-04-27 01-32-44.png", encoding: "7bit",…}
test
:
4good
index.js put api
app.put('/post', uploadMiddleware.single('file'), async (req, res) => {

    let newPath = null;
    if (req.file) {
        const { originalname, path } = req.file;
        const parts = originalname.split('.');
        const ext = parts[parts.length - 1];
        const newPath = path + '.' + ext
        fs.renameSync(path, newPath)
    }

    const { token } = req.cookies
    jwt.verify(token, secret, {}, async (err, info) => {
        if (err) throw err;
        const { id, title, summary, content } = req.body
        const postDoc = await Post.findById(id)
        const isAuthor = postDoc.author === info.id;


        // const postDoc = await Post.create({
        //     title: title,
        //     summary: summary,
        //     content: content,
        //     cover: newPath,
        //     author: info.id,
        // });

        res.json({ isAuthor });
    });

});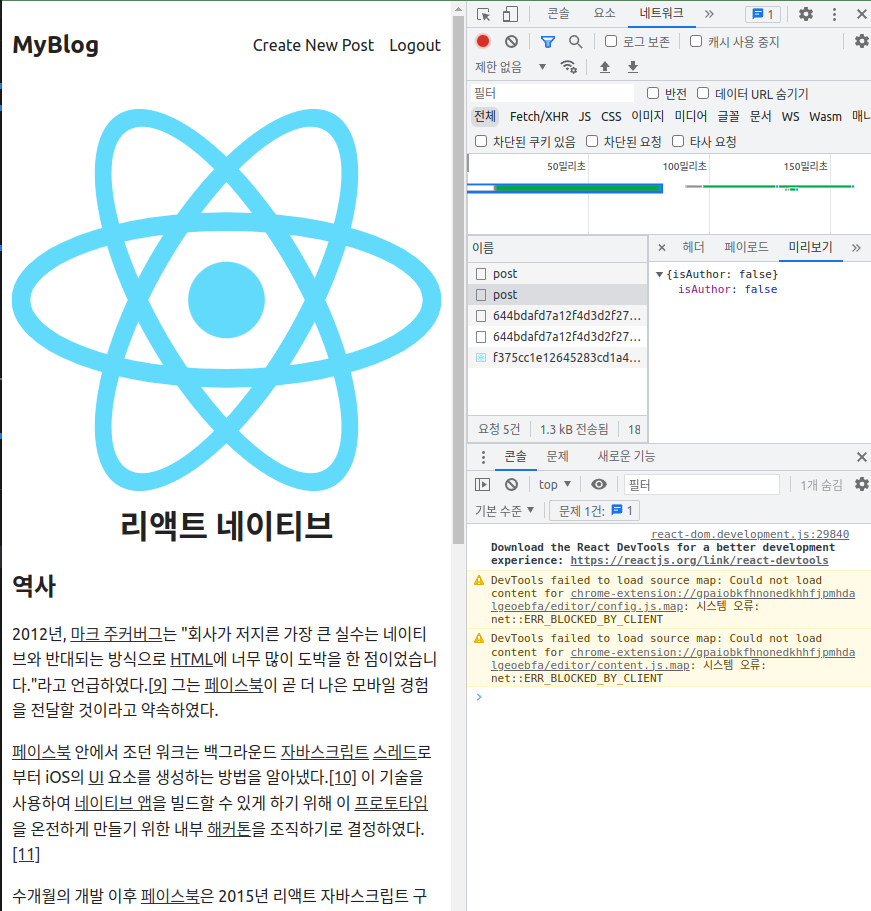
const isAuthor = JSON.stringify(postDoc.author) === JSON.stringify(info.id);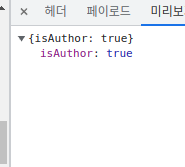
UPdate 기능 : 변경 내용 DB 저장
`postDoc.update()`는 Mongoose에서 지원하는 메소드가 아니기 때문에 그대로 사용할 수는 없습니다. 대신 `postDoc.save()`를 사용하여 도큐먼트를 업데이트할 수 있습니다.
`postDoc.save()` 메소드는 Mongoose 도큐먼트의 인스턴스 메소드로서, 해당 인스턴스의 수정 내용을 데이터베이스에 저장합니다. 따라서 `postDoc.save()` 메소드를 사용하여 수정된 도큐먼트를 데이터베이스에 반영할 수 있습니다. 아래는 `postDoc.save()` 메소드를 사용한 코드입니다.
app.put('/post', uploadMiddleware.single('file'), async (req, res) => {

    let newPath = null;
    if (req.file) {
        const { originalname, path } = req.file;
        const parts = originalname.split('.');
        const ext = parts[parts.length - 1];
        const newPath = path + '.' + ext
        fs.renameSync(path, newPath)
    }

    const { token } = req.cookies
    jwt.verify(token, secret, {}, async (err, info) => {
        if (err) throw err;
        const { id, title, summary, content } = req.body
        const postDoc = await Post.findById(id)
        const isAuthor = JSON.stringify(postDoc.author) === JSON.stringify(info.id);

        if (!isAuthor) {
            return res.status(400).json('you are not the author')

        }
        postDoc.title = title;
        postDoc.summary = summary;
        postDoc.content = content;
        postDoc.cover = newPath ? newPath : postDoc.cover;

        await postDoc.save();

        res.json(postDoc);
    });

});
위의 코드에서는 `postDoc.save()` 메소드를 사용하여 수정된 도큐먼트를 데이터베이스에 저장하도록 변경되었습니다. 이 코드를 사용하면 `postDoc.update()` 메소드를 사용하지 않고도 도큐먼트를 업데이트할 수 있습니다.
'SW Dev Portfolio' 카테고리의 다른 글
| JAVA SPRING - 정부 프레임 워크 JQuery 문법으로 DB 연동하여 SelctBox에 Data 바인딩 하기 (0) | 2023.05.22 |
|---|---|
| JAVA-Spring : Javascript +JQuery 메일 [보내는 사람] 전체 목록 삭제하기 (0) | 2023.05.22 |
| 장애인개발원 관리자페이지 인증제도 웹페이지 Editor 개발 완료 (0) | 2023.05.22 |
| 장애인 개발원 UD 유니버설디자인 개발 (0) | 2023.05.03 |
| 장애인 개발원 BF 개발 3일차 (0) | 2023.04.15 |
| 장애인 개발원 BF 개발 2일차 (0) | 2023.04.13 |