반응형
// 1. 사용자가 이미지를 업로드
// 2. 업로드한 이미지를 받아서 서버에서 저장
// 3. 저장한 이미지의 경로를 다시 클라이언트에게 전송
// 4. 경로를 받아서 post model에 저장
// 1. 사용자가 이미지를 업로드
FRONTEND
import React from 'react'
import { Form } from 'react-bootstrap'
import axios from 'axios'
function ImageUpload() {
// 1. 사용자가 이미지를 업로드
// 2. 업로드한 이미지를 받아서 서버에서 저장
// 3. 저장한 이미지의 경로를 다시 클라이언트에게 전송
// 4. 경로를 받아서 post model에 저장
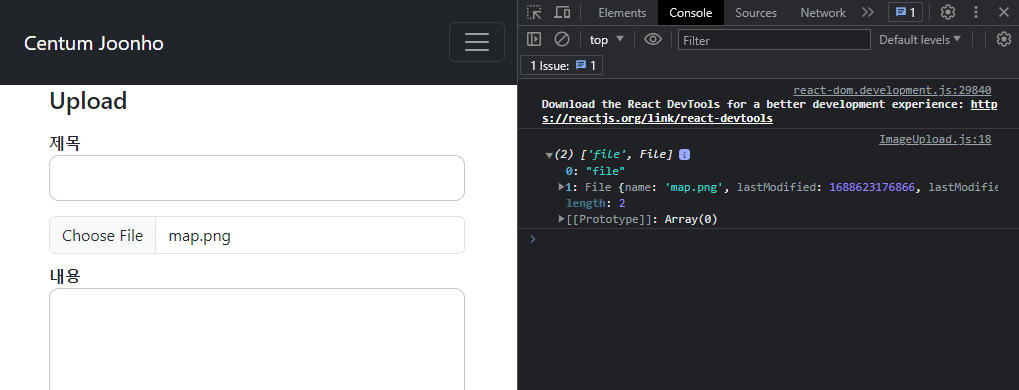
const FileUpload = (e) => {
console.log(e.target.files)
}
return (
<div>
<Form.Control
type='file'
className='shadow-none'
accept='image/*'
onChange={(e) => { FileUpload(e) }}></Form.Control>
</div>
)
}
export default ImageUpload
FormData API 활용
https://developer.mozilla.org/en-US/docs/Web/API/FormData
FormData - Web APIs | MDN
The FormData interface provides a way to construct a set of key/value pairs representing form fields and their values, which can be sent using the fetch(), XMLHttpRequest.send() or navigator.sendBeacon() methods. It uses the same format a form would use if
developer.mozilla.org
const formData = new FormData(); const FileUpload = (e) => {
const formData = new FormData();
formData.append("file", e.target.files[0])
for (const key of formData) console.log(key);
}
axio를 사용하여 formData 전송
axios.post('/api/post/image/upload', formData); const FileUpload = (e) => {
const formData = new FormData();
formData.append("file", e.target.files[0])
for (const key of formData) console.log(key);
axios.post('/api/post/image/upload', formData);
} // 2. 업로드한 이미지를 받아서 서버에서 저장
BACKEND
Mongoose DB setting
MOdel > Post.js
const { default: mongoose } = require("mongoose")

const postSchema = new mongoose.Schema({
    title: String,
    content: String,
    postNum: Number,
    image: String,

}, { collection: "Posts" })

const Post = mongoose.model("Post", postSchema);

module.exports = { Post };
server test
router.post('/image/upload', (req, res) => {
    console.log(req.formData)
});
result : undefined
여기서 MULTER 라이브러리를 사용해주면 된다.
https://github.com/expressjs/multer/blob/master/doc/README-ko.md
npm install --save multer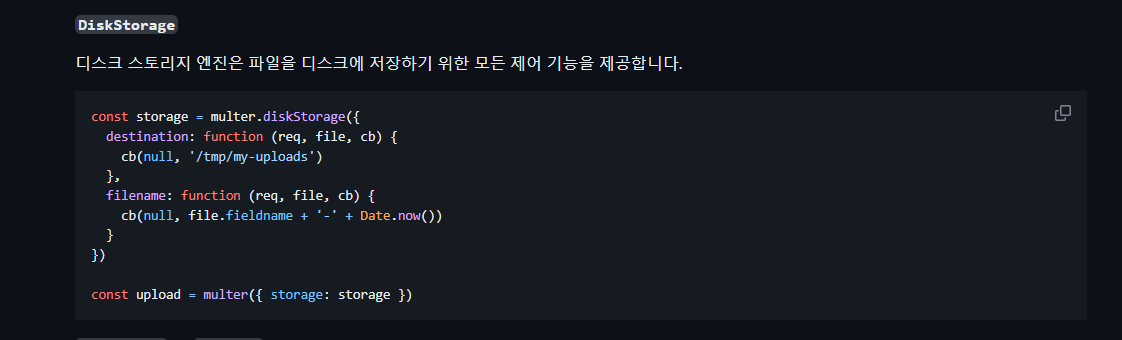
요거 그냥 긁어 준다.
const storage = multer.diskStorage({
    destination: function (req, file, cb) {
        cb(null, 'images/')
    },
    filename: function (req, file, cb) {
        cb(null, Date.now() + '-' + file.originalname)
    }
})
//.single('file') -> 파일 하나만 업로드
const upload = multer({ storage: storage }).single('file');


router.post('/image/upload', (req, res) => {

    upload(req, res, err => {
        if (err) {
            res.status(400).json({ success: false, })
        } else {
            console.log(res.req.file);
            res.status(200).json({ success: true, filePath: res.req.file.path })
        }
    }
    );
});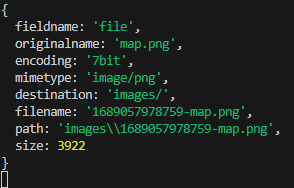
server 단에 images 폴더도 미리 생성 해줘야 경로 따라 파일이 저장된다 !
위에 나와 있는 path 를 다시 FRONTEND로 보내주자
main page
<ImageUpload setImage={setImage} />ImageUpload.js
import React from 'react'
import { Form } from 'react-bootstrap'
import axios from 'axios'

function ImageUpload(props) {

    // 1. 사용자가 이미지를 업로드
    // 2. 업로드한 이미지를 받아서 서버에서 저장
    // 3. 저장한 이미지의 경로를 다시 클라이언트에게 전송
    // 4. 경로를 받아서 post model에 저장

    const FileUpload = (e) => {

        const formData = new FormData();

        formData.append("file", e.target.files[0])

        for (const key of formData) console.log(key);

        axios.post('/api/post/image/upload', formData).then((response) => {

            console.log(response.data.filePath);

            props.setImage(response.data.filePath)

        });

    }
    return (
        <div>
            <Form.Control
                type='file'
                className='shadow-none'
                accept='image/*'
                onChange={(e) => { FileUpload(e) }}></Form.Control>
        </div>
    )
}

export default ImageUpload
DB 전송 body 값
  // body 집어넣는 변수는 db 칼럼 명과 맞춰야한다
    let body = {
      title: Title,
      content: Content,
      image: Image,
    };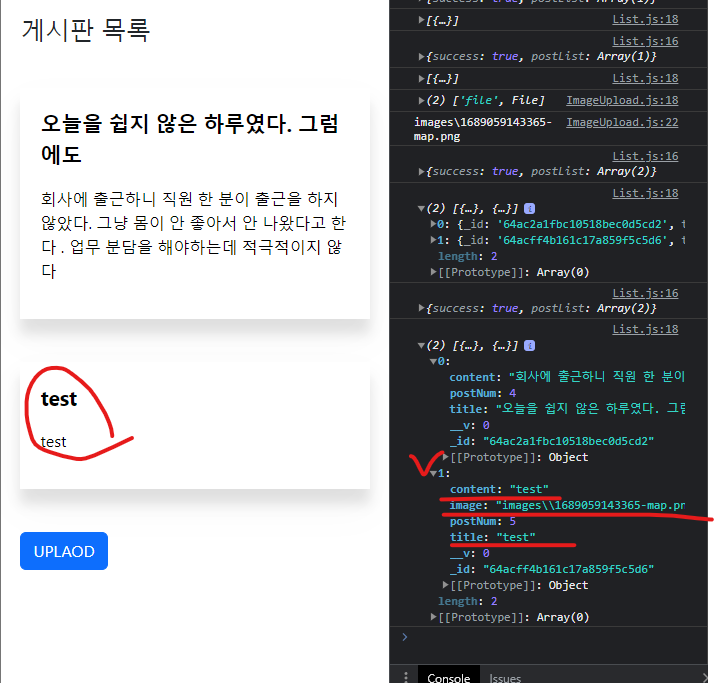
DB에 잘 입력 되어 있는 걸 확인할 수 있다.
이제는 해당 파일이 상세 페이지에서 보이도록 하면 된다.
반응형
'Web Dev > react.js' 카테고리의 다른 글
| React 웹페이지에서 네이버 지도 API 사용하는 방법 (10) | 2024.01.27 |
|---|---|
| React - Redux Toolkit 사용하여 Login 정보 store에 저장해서 필요할 때 사용하는 방법 ! (1) | 2024.01.27 |
| React 함수형 컴포넌트 생성 단축키 rafce , rfce + Extension (0) | 2023.10.12 |
| useCallback()을 사용하는 것은 큰 의미가 없거나 오히려 손해인 경우도 있습니다 (0) | 2023.09.25 |
| 블로그 맞춤 html-react-parser 라이브러리 사용법 ! 예시 포함 (0) | 2023.08.17 |
| useOncCickOutside , useClickAway 실전에서 사용하기 (0) | 2023.08.08 |


